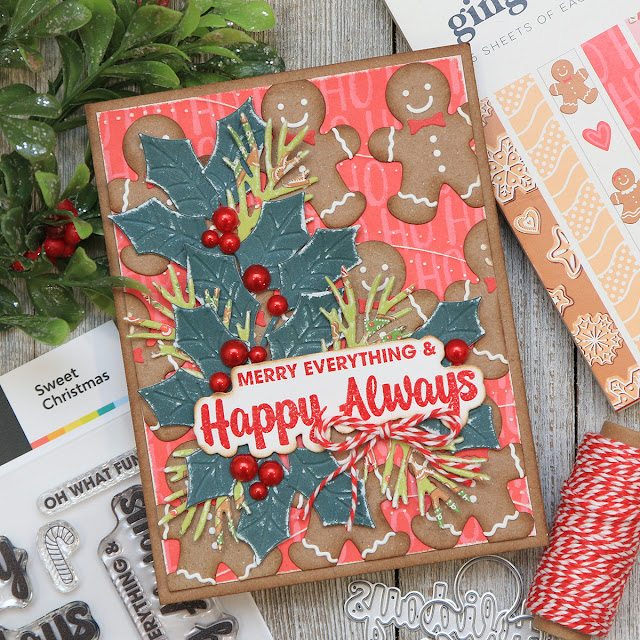
Are you looking for more Christmas card and gift tags ideas that are a snap to create? If so, then you don't want to miss out on the festive and fun Gingerbread Bundle from Scrapbook.com! With this coordinated set of festive holiday cookie dies and stamps you'll be checking off your Christmas making list with ease. And to make this deal even sweeter, Black Friday Savings have started at Scrapbook.com. They currently have a 10% off coupon code and three amazing freebies! Check out all the details on their Coupons & Deals page. Black Friday is being celebrated all week long with new deals and coupons throughout the week!
GINGERBREAD BUNDLE
The Gingerbread Bundle includes the 4x6 Sweet Christmas Stamp Set, the Gingerbread Holiday Cookies Die Set and a Gingerbread A2 Patterned Paper Pad. And if you're not a fan of fussy cutting, there is also a coordinating die set for the Sweet Christmas Stamp Set.
SWEET CHRISTMAS CARD
I've used this bundle to create a coordinating card and gift tag which you can check out below. If you're looking for more inspiration check out the Scrapbook.com Gingerbread Live Stream and the projects that have been shared on the product page for the bundle!
As for this card, I started with a piece of kraft paper cut to 4.25 x 5.5 inches and inked the edges with Vintage Photo Distress Ink. Next, I took the Ho Ho Ho paper from the Gingerbread Patterned Paper Pad and embossed it with the Scrapbook.com A2 Wavy with Dotted Accents Coverplate Die. To do this, I placed the die on the backside of the patterned paper that I wanted to use. That way the design is embossed into the paper.
I created the following sandwich for my Sizzix Foldaway die cutting machine:
- Standard Cutting Platform
- Silicone Rubber Pad
- Magic Mat
- Patterned Paper
- Die
- Standard Cutting Pad
The silicone rubber pad prevents the die from cutting the paper and turns the die into an embossing folder! I then very lightly rubbed over the raised embossed design with a Ranger Sanding Disk (basically fine grit sandpaper). This removes the ink and reveals the white core of the paper and makes the embossed design stand out even more!
Next, I die cut nine gingerbread men from kraft cardstock using the Holiday Cookies Die Set. I inked the edges of these with Vintage Photo Distress Ink. I then die cut the pieces to embellish the gingerbread man from white cardstock and the bow ties from red cardstock and adhered them to the gingerbread base using Artis Glue. I then adhered them to the card front.
Next, I die cut the holly and pine branches from some of the green papers in the Gingerbread Paper Pad using the Cozy Autumn Foliage Die Set. I sanded these as well and I love that by revealing the white core they look like they have snow on them.
For the sentiment I used the Sweet Christmas Stamp Set and stamped it with embossing ink and heat embossed it using Lumberjack Plaid Embossing Glaze. I then die cut it with the coordinating die set, inked the edges with Vintage Photo Distress Ink and adhered it to the card with double sided foam adhesive.
To finish off the card I adhered some red pearls using Glossy Accents as my adhesive and a small red and white baker's twine bow!
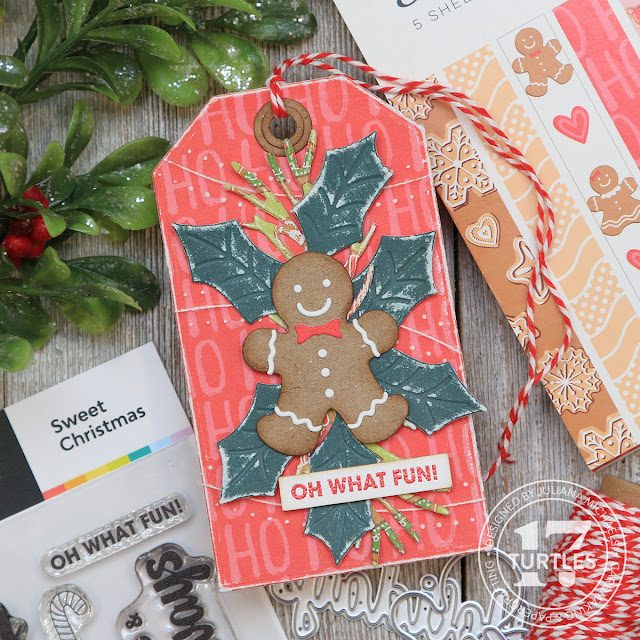
SWEET CHRISTMAS GIFT TAG
With the card completed, I thought it would be fun to create a coordinating gift tag. I used one of the tag dies from the Scrapbook.com Nested Tags Die Set and cut it from the same red paper I used on the card. I also embossed it with the same Wavy with Dotted Accents Coverplate Die and sanded it.
I die cut and assembled another gingerbread man and some more holly and pine branches and adhered them to the card. The sentiment is from the Sweet Christmas Stamp Set and I heat embossed it just like I did on the card. I then finished it off with some red and white baker's twine.
Thanks so much for stopping by today! I hope you enjoyed this bit of sweet holiday inspiration I created using the Scrapbook.com Gingerbread Bundle!
SUPPLIES
Below you can find the supplies I used to create these various Christmas Cards. When you shop through the links below, I receive a small commission from Scrapbook.com. These links are at no cost to you and the commission I receive helps me cover the costs of my blog and other expenses, and allows me to continue to provide you with FREE inspiration and tutorials. If you want to learn more about what an affiliate link is, you can see my full affiliate and product disclosure statement here. Thank you so much for your love and support!


No comments
Every time you smile at someone, it is an action of love, a gift to that person, a beautiful thing. ~Mother Teresa
HUGS!
JULIANA