My hope throughout this series is to inspire you as you begin creating your Christmas cards. Whether you get a start on them now, or wait until closer to the holiday season, you're sure to learn some great tips and techniques to take your Christmas cards to the next level.
In each video I'm sharing some great techniques, along with some helpful tips and tricks to make your Christmas crafting more enjoyable. Here on my blog, I'll be sharing the basic steps to complete the card. you can watch the video below or head over to my YouTube Channel. And while you're there, I'd love for you to consider subscribing to my channel!
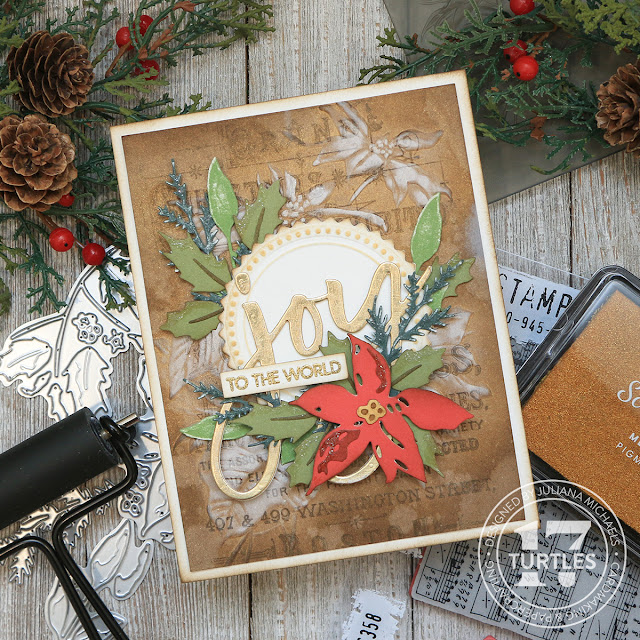
For this card, I'll be working with the Tim Holtz Sizzix Poinsettia Embossing Folder which unfortunately has been discontinued, but there are other similar and beautiful embossing folders out there that I'll link to. I'll also be using the Tim Holtz Sizzix Festive Bouquet Die Set and the Tim Holtz Seal Switchlet which is a combo embossing folder and die all in one. I'll also be using the Waffle Flower Oversized Joy Stamp and coordinating Die Set and the Tim Holtz Music and Advert Stamp set. If you don't have these dies and stamps, feel free to take a look in your stash for something similar.
To create the background for the card, I'll be using a brayer, Gold Metallic Pigment Ink, White Pigment Ink. The paper I'll be using is Distress Kraft Heavystock along with some colored cardstock for the die cutting.
JOY TO THE WORLD CHRISTMAS CARD
I started off with a piece of Distress Kraft Heavystock cut to 4 x 5.25 inches and I stamped the Advert image from the Tim Holtz Music and Advert Stamp set onto it using Ground Espresso Archival Ink.
Next I took the Tim Holtz Poinsettia Embossing Folder and used a brayer to apply Gold Metallic Pigment Ink to it. Once the folder was covered with the ink, I place the Kraftstock inside and ran it through my die cutting machine. This transferred the ink onto the paper while the design was embossed into the paper. I repeated this process of inking the folder and running it through my die cutting machine for a total of three times.
For the next step I took a white pigment ink pad and gently rubbed it over the raised areas on the embossed and inked paper. As I applied the ink, the poinsettias started to pop against the metallic background.
The third step was to apply Walnut Stain Distress Ink to the edges of the paper. I then used a Distress Sprayer to spritz the paper with water and activate the ink. I then dried the paper with my heat tool.
For the Seal Thinlit, I die cut and embossed it using a piece of heavyweight white cardstock. I then rubbed the Gold Metallic Ink Pad lightly over the raised areas which made them stand out against the white paper. I then inked the edges with Walnut Stain Distress Ink.
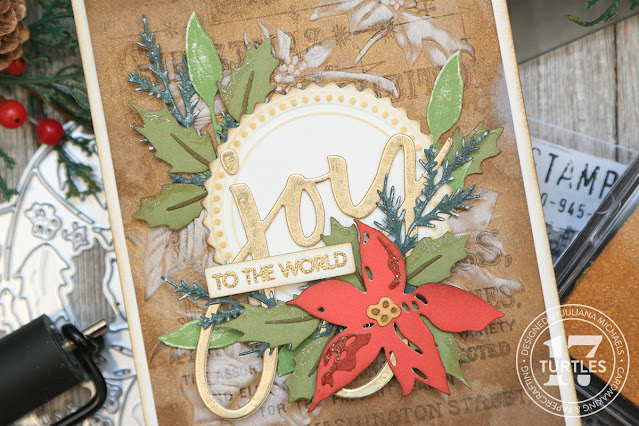
Next, I die cut the word Joy using the Waffle Flower Oversized Joy Die Set from Gold Metallic Kraft Stock and twice from heavyweight white cardstock. I adhered these layers together to make the die cut a little more sturdy and to add a touch of dimension. I then lightly sanded the gold paper to give it a distressed look and adhered it to the seal using Artis Glue.
The greenery pieces were die cut from various colors of Scrapbook.com Paper Pads which have a white core. I gently sanded some of them to reveal this white core, which makes it look like they have snow on them. Once they were all assembled, I adhered them to the card. The ultra fine precision tip on the Artis Glue came in super handy for adhering these small delicate die cuts.
After I finished adhering the greenery, I trimmed off any ends that were sticking out and attached the poinsettia using double sided foam tape.
For the sentiment strip, I used the Waffle Flower Oversized Joy Stamp Set. I stamped it using embossing ink and then heat embossed it with gold embossing powder. The base of the card is a piece of heavyweight white cardstock cut to 4.25 x 5.5 inches and I inked the edges with Walnut Stain Distress Ink.
The final touch on the card was to apply Artis Glue to the edges of the die cuts and then apply Rock Candy Glitter using a Glitter Duster.
I really love the shimmer, shine, interest and dimension you can achieve by layering the various inks over the stamped and embossed paper. This might just be my new favorite technique and I'll definitely be using it again very soon!
SUPPLIES FOR JOY TO THE WORLD CHRISTMAS CARD
Below you can find the products I used to create this card along with compensated affiliate links to Scrapbook.com. These links are at absolutely no cost to you. When you shop through the links below, I receive a small commission from Scrapbook.com. These links are at absolutely no cost to you and the commission I receive helps me cover the costs of my blog and other expenses, which allows me to continue to provide you with FREE inspiration and tutorials. If you want to learn more about what an affiliate link is, you can see my full affiliate and product disclosure statement here. Thank you so much for your love and support!


No comments
Every time you smile at someone, it is an action of love, a gift to that person, a beautiful thing. ~Mother Teresa
HUGS!
JULIANA