Junk Journal Journey Part 4 | Junk Journal Flip Through

Hello friends! Welcome back for Part 4 of my Junk Journal Journey. If you've missed the other 3, you can find links to the videos down below.

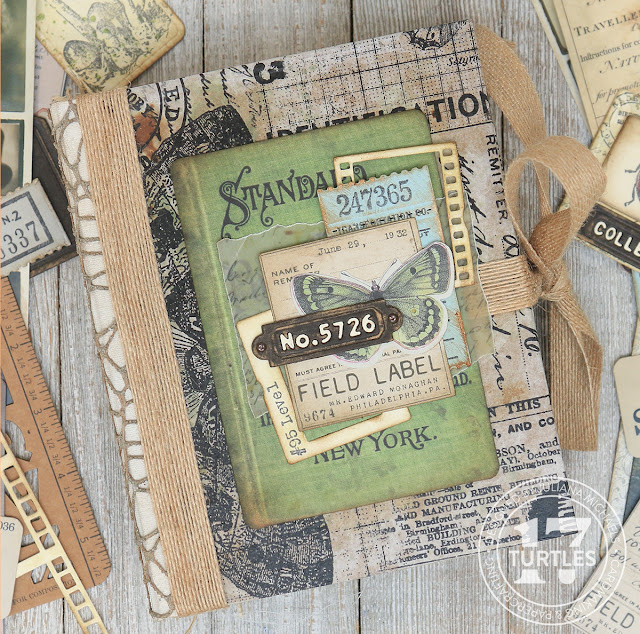
In this video I'm sharing a flip through of my completed junk journal. You'll be able to see how I've incorporated the bits and bobs that I created in Part 3, along with how I've created other little clusters of ephemera to embellish my journal.

If you want to check out any of the supplies I'm using I have them linked down below. Using those links helps support me, so I really appreciate it!

Junk Journal Journey Part 4 | Junk Journal Flip Through by Juliana Michaels

JUNK JOURNAL JOURNEY PART 4

You can check out the video for my completed junk journal below or by click this link: Junk Journal Journey Part 4


I hope you enjoyed this flip through of my junk journal and found some inspiration you can use as you have your next creative play time!

JUNK JOURNAL JOURNEY PLAYLIST

If you are looking for the rest of my Junk Journal Journey, make sure to check out my Junk Journal Journey Playlist.

SUPPLIES 

Below you can find the products I used to create my junk journal along with compensated affiliate links to Scrapbook.com. These links are at absolutely no cost to you. When you shop through the links below, I receive a small commission from Scrapbook.com. These links are at absolutely no cost to you and the commission I receive helps me cover the costs of my blog and other expenses, which allows me to continue to provide you with FREE inspiration and tutorials. If you want to learn more about what an affiliate link is, you can see my full affiliate and product disclosure statement here. Thank you so much for your love and support!

Berry Sweet Basket 2 Ways

Today I'm sharing two cards that feature the Berry Sweet collection from Scrapbook.com and the berry basket two ways. While I created these cards and assembled the adorable strawberries and baskets I was taken down memory lane! As a child growing up in southeast Missouri, May was always strawberry month. It was also my birthday month so my Mom always made me a strawberry cake of some sort. We also grew our own strawberries and I remember the sweet joy of eating as many of them as I could without my Mom seeing me as we were picking them! Now that we've strolled down memory lane for a few, let's get into the making!

Berry Sweet Basket 2 Ways - cards by Juliana Michaels featuring Scrapbook.com Berry Sweet Die Set and Sunny Lane Florals Die Set

THANK YOU BERRY MUCH CARD | A2 Size

For my first card, I went rather traditional and used the Berry Sweet Die Set to create a berry basket filled with strawberries. I die cut the basket layers, the strawberry layers, the centers of the flowers, the leaves and the word berry from Distress Watercolor Paper. I then used ink blending brushes to apply various colors of Distress Oxide Inks to the die cuts. I die cut the flower base and shadow layer from white cardstock.

Distress Oxide Colors:
Basket - Walnut Stain and Brushed Corduroy
Strawberries - Scattered Straw, Festive Berries and Aged Mahogany
Flower centers - Fossilized Amber
Leaves - Peeled Paint and Forest Moss
Word Berry - Festive Berries

Thank you Berry Much Card by Juliana Michaels featuring Scrapbook.com Berry Sweet Die Set

After I applied the ink, I lightly spritzed all of the pieces with water using my Distress Sprayer and dried them with my heat tool. I then assembled the layers using Distress Collage Medium as my adhesive. I inked the edges of the basket with Vintage Photo Distress Ink. I added tiny dots of Chocolate Kiss Pops of Color to add detail to the flower centers.


As I assembled the berries, leaves and flowers inside the basket, I adhered them with either Distress Collage Medium or Double Sided Foam Adhesive which gives them a little bit of dimension.

The sentiment was created using stamps from the Berry Sweet Stamp Set. I stamped it with Festive Berries Distress Oxide Ink onto white cardstock and then trimmed them into small strips. All of the sentiment pieces are adhered with Double Sided Foam Strips.


The pink gingham paper behind the basket is from the Berry Sweet A2 Paper Pad. I trimmed it to 4 x 5.25 inches, inked the edges lightly with Vintage Photo Distress Ink and added some machine stitching. I then adhered it to a green plaid paper which is also from the same paper pad.


HELLO CARD | A2 Size

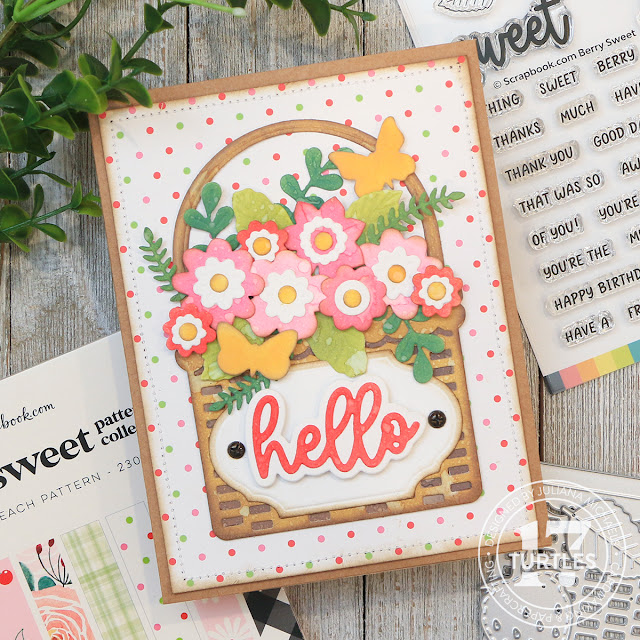
For the second basket, I departed from the berry theme and decided to fill it with flowers and butterflies! You might notice it also has a handle and I'll share how I created that.

Hello Card by Juliana Michaels featuring Scrapbook.com Berry Sweet and Sunny Lane Florals Die Set

This card was created in much the same way as the first card. I used the Berry Sweet Die Set for the basket and label. I used the Sunny Lane Florals Die Set for the flowers and leaves. The butterflies are from the Butterflies 2 Die Set and the sentiment is from the Thank You Sentiments II Die Set. All of the colored pieces were cut from Distress Watercolor Paper, inked with Distress Oxide Ink and spritzed with water.

Distress Oxide Colors:
Basket - Walnut Stain and Brushed Corduroy
Flowers - Kitsch Flamingo, Picked Raspberry, Festive Berries
Flower centers - Fossilized Amber
Leaves - Peeled Paint and Rustic Wilderness
Butterflies - Fossilized Amber
Word Hello - Festive Berries


The label, shadow layer for the sentiment and the flower centers were cut from white cardstock. I inked the edges of the label, flowers, butterflies and basket with Walnut Stain Distress Ink.


I adhered Hardware Heads to the label using Distress Collage Medium as my adhesive. Before adhering them, I colored them with Mushroom Alcohol Ink.


Now onto how I created the handle for the basket. I took 2 of the Scrapbook.com Nested Arches and nested them on a piece of Distress Watercolor Paper. I used a piece of Mint Tape to hold them in place so they wouldn't shift as I ran the dies through my die cutting machine.


And viola...a handle for my basket! I used two dies that were next to each other in size, but if you wanted a thicker handle you could go to the next size down.


I hope you enjoyed this bit of inspiration and seeing the Berry Sweet Basket 2 Ways! What would you fill the basket with? Strawberries? Cherries? Flowers? Or maybe something else?


SUPPLIES

Below you can find the products I used to create these card along with compensated affiliate links to Scrapbook.com. These links are at absolutely no cost to you. When you shop through the links below, I receive a small commission from Scrapbook.com. These links are at absolutely no cost to you and the commission I receive helps me cover the costs of my blog and other expenses, which allows me to continue to provide you with FREE inspiration and tutorials. If you want to learn more about what an affiliate link is, you can see my full affiliate and product disclosure statement here. Thank you so much for your love and support!

Mother's Day Card | Faux Bleach Technique

With Mother's Day coming this weekend, I wanted to create a special card for my Mom and I was inspired by Tim's recent YouTube Live where he demonstrated a faux bleach technique with colored cardstock and Distress Ink. I initially attempted his method with purple Kraft Stock, but I didn't like the results I achieved and I wanted to use the color purple since it is my Mom's favorite color. I then remembered doing this technique myself, many years ago and decided to revisit my method but with a Tim Holtz twist!

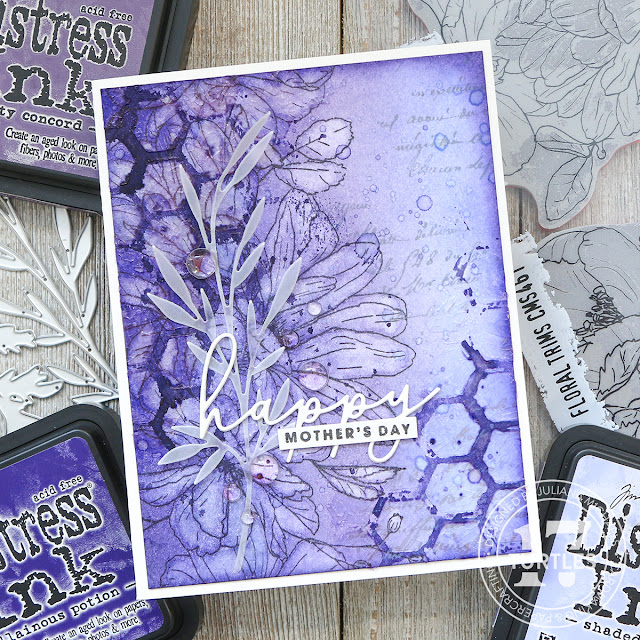
Happy Mother's Day Card by Juliana Michaels featuring Tim Holtz Floral Trims Stamp Set and Faux Bleach Technique

For those of you who are interested, I created a video showing how I created this card. However, since Mother's Day has come and gone, I decided to recreate it with a birthday theme and to switch up the color pallete. Here's a look at the card I create in the video.


Head on over to my YouTube channel to check it out or you can watch it below.


FAUX BLEACH TECHNIQUE

I began with a piece of Distress Watercolor Paper and stamped one of the images from Floral Trims onto it using Black Soot Archival Ink. I then ink blended over the stamped image using Shaded Lilac, Dusty Concord and Villainous Potion. I created a gradient from dark to light with Villainous Potion on the far left hand side, Dusty Concor in the middle and Shaded Lilac on the right.

I then took a waterbrush and removed the ink from inside the stamped image to create the faux bleach effect. I made sure to wipe off the brush frequently to prevent just moving the ink around and I used a paper towel to dab up the areas where I applied the water to help remove the ink.


Next, I took the script stamp from Exquisite and stamped just parts of it along the right hand sided using Hickory Smoke Distress Oxide Ink. I then splattered the panel with water using a brush to create small water droplets and dried the paper.

MONOPRINTING WITH STENCILS

Now for the stencil work. I took the hexagon stencil from Mini Stencils Set 55 and sprayed it with Villainous Potion Spray Stain and then a bit of water. I then placed some torn paper towels on my card front at a angle creating a mask of sorts so that only the hexagon area would apply ink to the paper and not the solid border area. I then dabbed over the stencil with a paper towel. I did this in the top left and bottom right hand corner. I then dried the ink with my heat tool.  I then inked the edges with a bit of Villainous Potion Distress Ink.


For a bit more texture and interest, I then placed the stencil back over the areas where I had done the mono print and applied Distress Translucent Crackle Paste through the stencil. I then set the paper to the side to allow the paste time to crackle and dry. You can just barely see the effect this created  in the photos, so if you'd like to see a video that really captures how it looks, make sure to pop over to my Instagram to check it out.

To embellish the card, I used the Sizzix Woodland Stems to die cut a piece of vellum. I trimmed off just a bit of the stem and then adhered it to my card using Distress Collage Medium. For the sentiment, I die cut the word happy from white cardstock that had been run through my Xyron Sticker maker before I die cut the word. I then stamped the words Mother's Day using black ink and the Scrapbook.com Celebrate Expressions Stamp Set onto white cardstock. I completed the card by adhering some clear water droplets using Glossy Accents.


Thanks for stopping by! Whether or not you're making a Mother's Day card, I hope you'll give this Faux Bleach Technique a try.

SUPPLIES FOR MOTHER'S DAY CARD

Below you can find the products I used to create this card along with compensated affiliate links to Scrapbook.com. These links are at absolutely no cost to you. When you shop through the links below, I receive a small commission from Scrapbook.com. These links are at absolutely no cost to you and the commission I receive helps me cover the costs of my blog and other expenses, which allows me to continue to provide you with FREE inspiration and tutorials. If you want to learn more about what an affiliate link is, you can see my full affiliate and product disclosure statement here. Thank you so much for your love and support!

SUPPLIES FOR BIRTHDAY CARD

Junk Journal Journey Part 3 | Tickets, Pockets, Ephemera and More

Hello friends! Welcome back for Part 3 of my Junk Journal Journey. If you've missed the other 2, you can find links to the videos down below.

During my Junk Journal Journey I took some time to make lots of bits and bobs to put into my journal. In this video I'm sharing how I created tickets, pockets, ephemera, a specimen slide, and a large specimen folder using a mix of stamps and dies. While I know a traditional junk journal uses actual recycled items, this journey for me is about the process of using the products and supplies I have.

If you want to check out any of the supplies I'm using I have them linked down below. Using those links helps support me, so I really appreciate it!

Junk Journal Journey Part 3 by Juliana Michaels featuring Tickets, Pockets, Ephemera, Specimen Slides

Now it's time to grab your favorite beverage and sit back and relax as you check out my Junk Journal Journey Part 3 video.

Junk Journal Journey Part 3


If you happened to miss Part 2 and Part 1 of my Junk Journal Journey you can check them out below.

Junk Journal Journey Part 2 

Junk Journal Journey Part 1

I hope you enjoyed the video I put together sharing about how I created some of the bits and bobs that I end up using in my junk journal. I'll be sharing a flip through of the completed junk journal soon, so stay tuned!

SUPPLIES 

Below you can find the products I used to create the tickets, pockets, ephemera, specimen slide, and  large specimen folder for my junk journal along with compensated affiliate links to Scrapbook.com. These links are at absolutely no cost to you. When you shop through the links below, I receive a small commission from Scrapbook.com. These links are at absolutely no cost to you and the commission I receive helps me cover the costs of my blog and other expenses, which allows me to continue to provide you with FREE inspiration and tutorials. If you want to learn more about what an affiliate link is, you can see my full affiliate and product disclosure statement here. Thank you so much for your love and support!

Letterpress Effects with Embossing Folders and Dies

Hello friends! Today I have a new card and video to share featuring some of the new dies and embossing folders from the Tim Holtz 2023 Sizzix Everyday Release. There are so many great dies and embossing folders in this release and they are perfect for all those everyday moments, as well as special occasions and holidays. The card I've created would be perfect for Mother's Day, Father's Day or anyone special in your life. In the video I'm sharing how to get a letterpress effect with embossing folders and dies that is really quite easy.

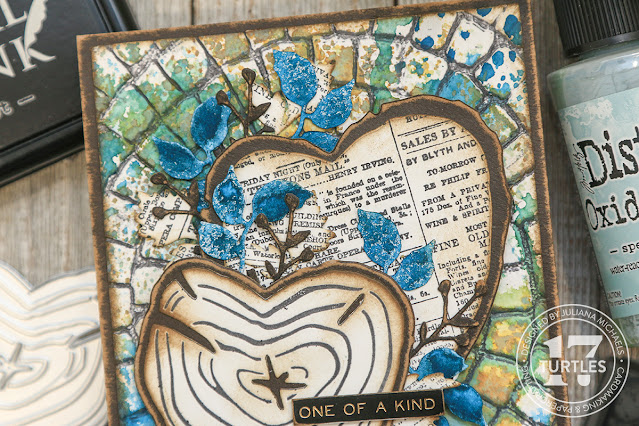
One Of A Kind Card by Juliana Michaels featuring Tim Holtz Sizzix Wood Slices Thinlits, Brushstroke Mini Flowers Thinlits, 3D Mosaic Embossing Folder

If the video isn't showing up for you, click HERE to watch it.


Here are some close up images of the card I created. The dies I used include Wood Slices Thinlits, Brushstroke Mini Thinlits and the 3D Mosaic Embossing Folder. You can find a complete supply list below.


Thanks so much for stopping by and checking out my video! I hope you enjoyed learning how I created this card and how to create letterpress effects with embossing folders and dies!

If you're looking for more inspiration using some of the dies and embossing folders from the Tim Holtz 2023 Sizzix Everyday Release feel free to check out one of the following projects:


Hello Card by Juliana Michaels featuring Tim Holtz Tailored Thinlits, Brushstroke Flowers Mini Thinlits,Alphanumeric Emporium Thinlits


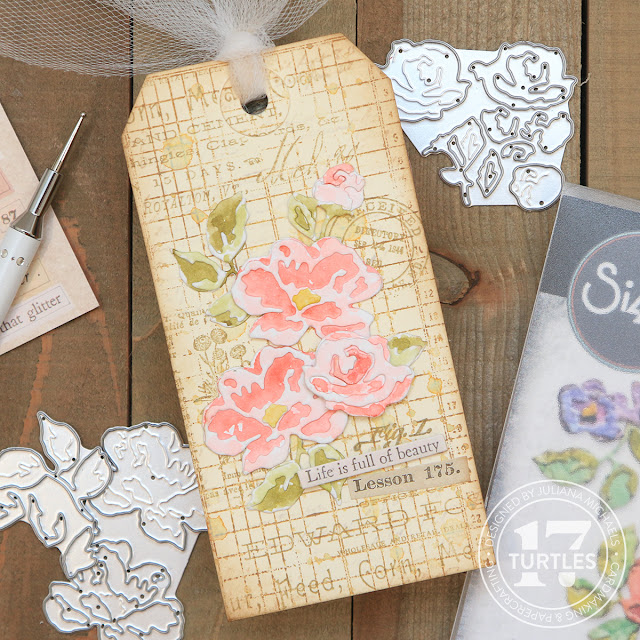
Life Is Full of Beauty Tag by Juliana Michaels featuring Tim Holtz Brushstroke Flowers Mini Thinlits


3 Chaps Coffee Company Framed Panel by Juliana Michaels featuring Tim Holtz Gentlemen Thinlits, Papercut Cafe Thinlits, Alphanumeric Emporium Thinlits and Dotted Embossing Folder


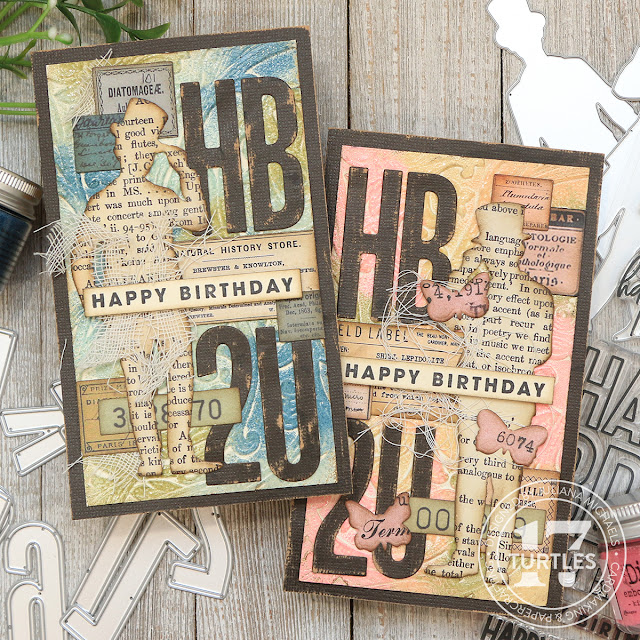
Happy Birthday Cards by Juliana Michaels featuring Tim Holtz Gentlemen Thinlits, Alphanumeric Bulletin Thinlits and 3D Entangled Embossing Folder


Thinking Of You Card by Juliana Michaels featuring Tim Holtz Blossom Thinlits and Dotted Embossing Folder


Blossom Birthday Cards by Juliana Michaels featuring Tim Holtz Blossom Thinlits

SUPPLIES

Below you can find the products I used to create this card along with compensated affiliate links to Scrapbook.com. These links are at absolutely no cost to you. When you shop through the links below, I receive a small commission from Scrapbook.com. These links are at absolutely no cost to you and the commission I receive helps me cover the costs of my blog and other expenses, which allows me to continue to provide you with FREE inspiration and tutorials. If you want to learn more about what an affiliate link is, you can see my full affiliate and product disclosure statement here. Thank you so much for your love and support!
Subscribe