Hello crafty friend and welcome! Today I'm celebrating in more ways than one. I'm celebrating the Tim Holtz 2023 Sizzix Release and I'm doing it by sharing some birthday cards! The new release is now available at Scrapbook.com and I want to thank them for sending some of the new products to me to create with. This new release has you covered from New Year's to Summer Vacation, and includes dies that are perfect for Valentine's Day, Easter, Spring, Mother's Day, Father's Day, 4th of July and so much more!
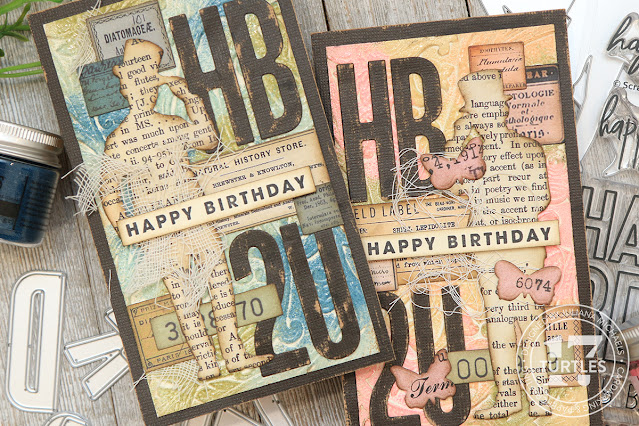
It also got me in the mood to start working on my birthday cards for the year and what better way to do that than to create two versions of the same card. Just by switching out the colors I was able to create a masculine and feminine version of the same card. If you prefer a different color choice you can always go neutral or even rainbow or choose the intended recipients favorite color! You may also notice that I didn't use traditional looking birthday dies to create my cards (even though there is a set that is perfect for celebrations) and went with ones that fit my design style. Even though they are nontraditional, they still lend themselves perfectly to creating birthday cards and it shows just how versatile these die sets can be!
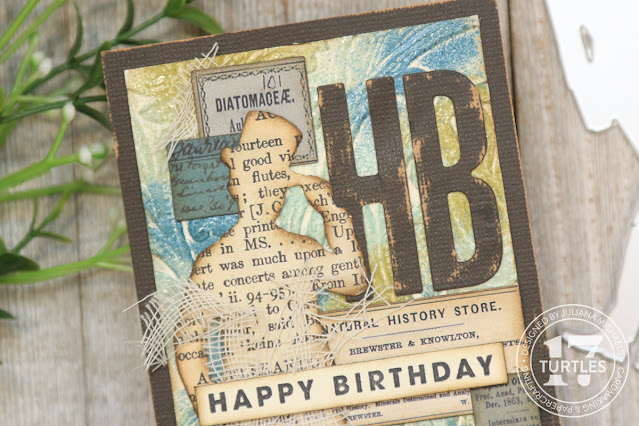
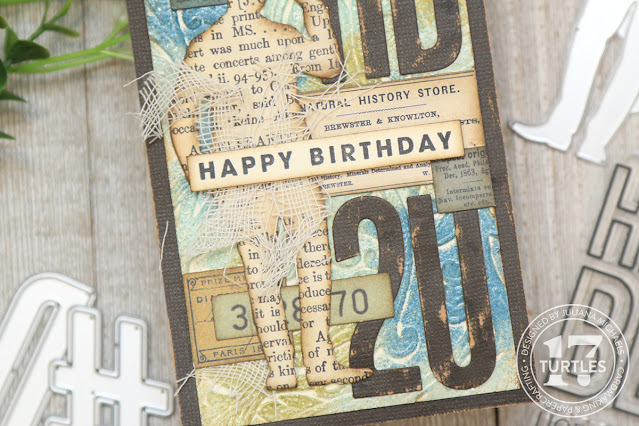
Blue Masculine Happy Birthday Card
Before I go into the details, I want to share that both of these cards are a modified/mini slimline and measure 3.5 x 6 inches. I ended up with this size because I started off with the idea of making a tag using the Tim Holtz Mixed Media Heavystock Number 8 Tag as my base. After creating the first tag though, I decided to trim off the top just below the hole reinforcer mount it onto a piece of black Kraftstock and turn it into a card.
To get started, I began with the Tim Holtz Mixed Media Heavystock Number 8 Tag and embossed it using the 3D Entangled Embossing Folder. I did not spritz the paper with water and only ran it through my die cutting machine once.
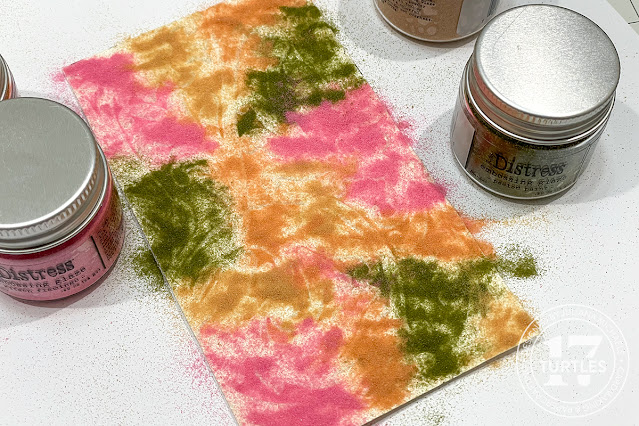
Next, I rubbed an embossing ink pad over the surface of the tag and then sprinkled a mix of Distress Embossing Glazes over the inked tag. I used my fingers to pick up the powder and sprinkle it onto the tag. On this card I used the following colors: Uncharted Mariner, Peeled Paint, Speckled Egg and Weathered Wood. Once I had covered the surface, I tapped off the excess into the trash can and then used my embossing gun to melt the embossing glaze. If you want an even more distressed effect, you can rub a brown Distress Crayon over the surface and then use your finger to rub it into the cracks and crevices. I've used this Glazed Ceramic Effect in the past and had planned to do it on this tag, but I ended up changing my mind and went for the less distressed look.
After the background was completed, I began adding the layers of labels and die cuts. The small labels are from the Tim Holtz Ephemera Snippets. I selected some that were cream, blue and green to coordinate with the background.
Next, I took the Gentlemen Thinlits and die cut one of them from a piece of text paper from the Tim Holtz Backdrops Volume One. I also cut it from a thin piece of chipboard and glued these layers together to give the die cut a little more stability. I then inked the edges with Walnut Stain Distress Ink. Next, I die cut the HB2U from Black Kraftstock using the Alphanumeric Bulletin Dies (minus the outside border piece) and sanded it slightly to reveal the kraft core.
I used Distress Collage Medium to adhere the labels and die cuts to the background. Because the surface is covered with the embossing glaze, I recommend placing something heavy on top of the piece and giving it some time to dry.
For some added texture I tucked it some small pieces of Mummy Cloth which looks a bit like cheese cloth. It is a wonderful way to add some texture. Unfortunately it is only available during Halloween, so you may have a tough time locating it if you don't already have some in you stash.
The final touch was the sentiment, which is from the Scrapbook.com Happy Birthday Stamp Set. I stamped it onto a piece of Distress Mixed Media Heavystock using Black Soot Archival Ink. I then trimmed it down, inked the edges with Walnut Stain Distress Ink and adhered it to my card using double sided foam tape.
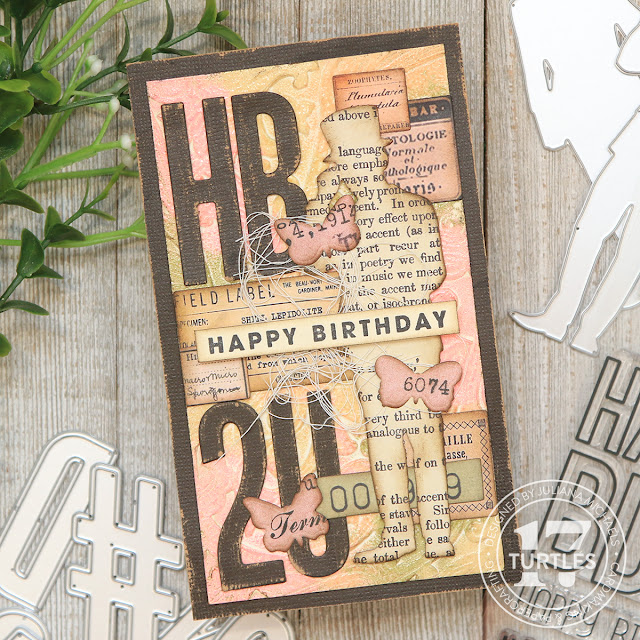
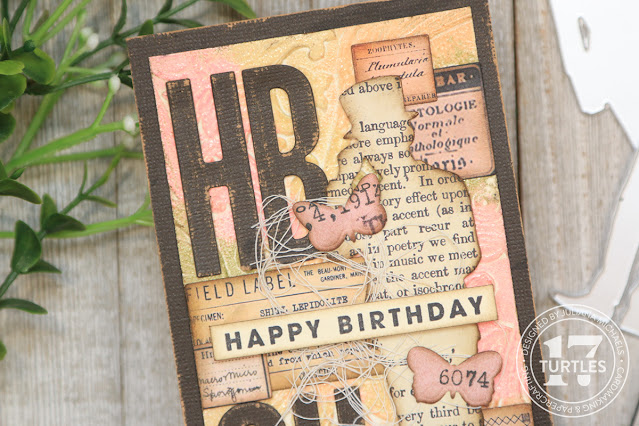
Pink Feminine Happy Birthday Card
On this card, I used all the same techniques as the blue version. The only differences are that I used different embossing glaze colors, a different Gentlemen die and added some small butterfly die cuts.
For the background I used Peeled Paint, Tattered Rose, Antique Linen and Kitsch Flamingo Embossing Glazes.
I selected labels that were cream, pink and green ink color. For the butterflies, I used a piece of pink paper from the Backdrops Volume One Paper Pad and cut it using the Scrapbook.com Butterflies 2 Die Set. Before adhering them to the card, I bent up the wings and then only applied adhesive to the body part so that they would have a little dimension.
I once again used some of the Mummy Cloth for added texture, but this time I used some piece that had pulled loose and where like long threads that I swirled and twisted together.
The final touch was once again the stamped happy birthday sentiment.
Thanks so much for stopping by today! I hope you enjoyed this bit of birthday card inspiration using the Tim Holtz Sizzix 2023 release including Entangled 3D Embossing Folder, Gentlemen Thinlit Dies and Alphanumeric Bulletin Thinlit Dies.
SUPPLIES
Below you can find the products I used to create these cards along with compensated affiliate links to Scrapbook.com. These links are at absolutely no cost to you. When you shop through the links below, I receive a small commission from Scrapbook.com. These links are at absolutely no cost to you and the commission I receive helps me cover the costs of my blog and other expenses, which allows me to continue to provide you with FREE inspiration and tutorials. If you want to learn more about what an affiliate link is, you can see my full affiliate and product disclosure statement here. Thank you so much for your love and support!







No comments
Every time you smile at someone, it is an action of love, a gift to that person, a beautiful thing. ~Mother Teresa
HUGS!
JULIANA