I know the other day I said I had a Halloween Banner to share with you, well I had my dates wrong and that will be coming sometime next week. Stay tuned...it will be part of something super fun that I can't wait to share with you!
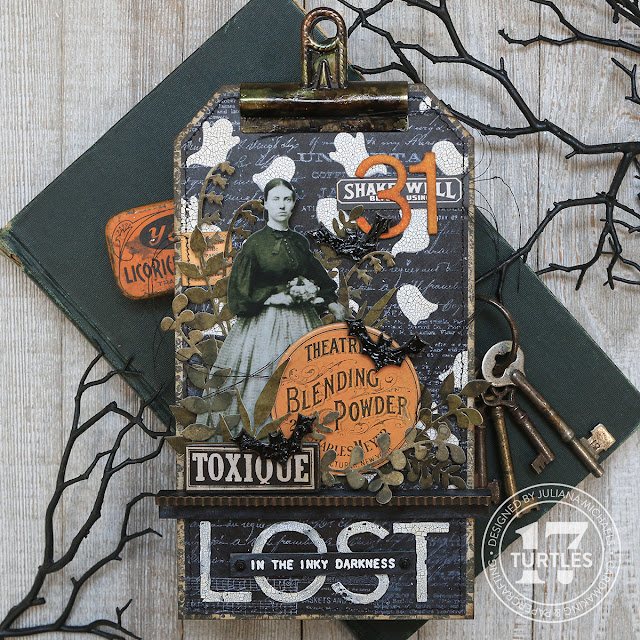
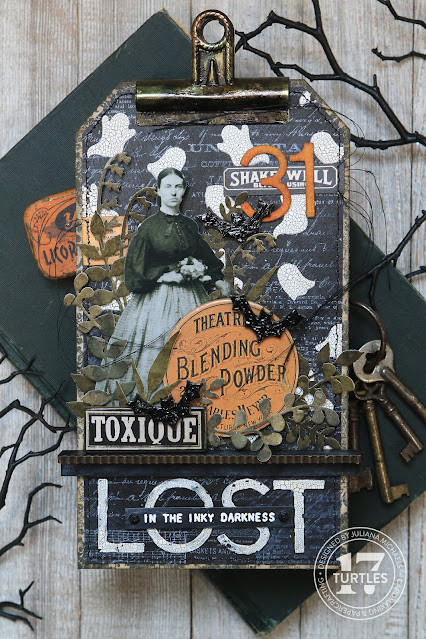
As for today, never fear, I still have some Halloween inspiration to share! I recently created this Lost In The Inky Darkness Halloween Tag featuring a mix of delightfully wicked stamps, stencils, dies and more!
LOST IN THE INKY DARKNESS HALLOWEEN TAG
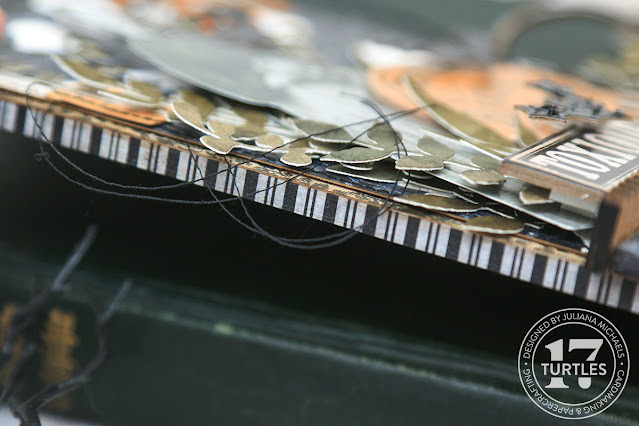
The base of this project is a Tim Holtz Stampers Anonymous Thickboard Mini Tag. These are made from a thick material (kind of like MDF) and are perfect for creating home decor type pieces. This particular tag is 4.5 x 8 inches and about 3/16 inch thick.
I adhered a strip of Halloween Design Tape around the outer edge to make it look pretty and give it a finished look from the side. You could use washi tape or even paint it if you prefer.
I then adhered a piece of patterned paper from my stash using Collage Medium, trimmed off the excess using a craft knife and then inked the edges with Walnut Stain Distress Ink. I then used the tag as a template and traced it onto a piece of Black Kraftstock. Using a ruler, I measured in an 1/8 of an inch on all sides and trimmed off the excess to create a slightly smaller tag shape that I could layer onto the main panel.
After the Collage Medium was dry, I placed the Little Ghosts Stencil over the paper and applied Distress Crackle Paste through the stencil. I left the bottom 1.5 inches plain to have room for the title piece. I then removed the stencil, washed it immediately and set the paper to the side to dry and crackle.
The reason I applied the Collage Medium before the Crackle Paste was so that the Crackle Paste would have something to adhere to. If you apply the Crackle Paste directly to the paper it will just crack right off the paper once it is dry.
Once the paste was dry, I lightly rubbed a bit of Walnut Stain Distress Ink over the ghosts to give them a slightly aged look. I also added some machine stitching around the outside edge. This will cause some of the paste to crack off, but most of it will stay put. Once this was completed, I adhered this layer to the tag.
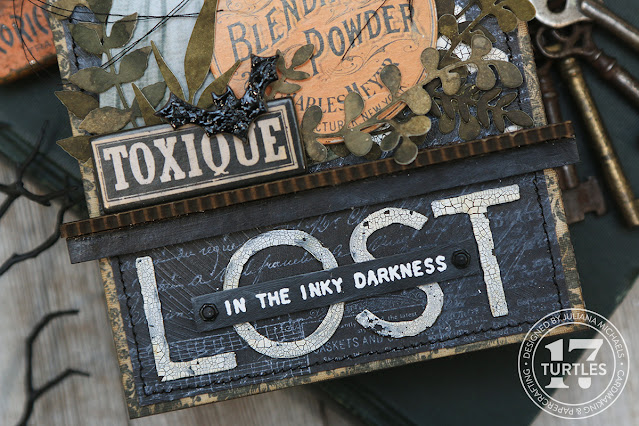
Next I took a trim piece from the Thickboard Pinked Trims and a strip from the Thickboard Bats and Webs. I used the Decorate Trims Dies to cut a piece of Black Kraftstock to adhere onto the pinked one and cut a strip of the same paper for the other strip. If you don't have the dies, you could also just paint these pieces with black paint. I adhered the paper using Distress Collage Medium. To give them the same look as the black background paper, I applied Distress Collage Medium and while it was still wet, I used my finger to dab on and smudge a bit of Picket Fence Distress Ink. If you attempt this, just make sure to use a clean finger if you need to add more ink so that you don't add the Collage Medium from your finger onto your ink pad. I then adhered these two pieces together to create a shelf and then adhered the shelf to the tag using Distress Collage Medium. I recommend using some sort of clamp to hold the shelf together while the glue dries and then to hold it onto the tag while the glue dries.
To create the scene, I die cut a bunch of leaves from the Scrapbook.com Delicate Leaves Die Set. I die cut them from pieces of Distress Watercolor paper that I had sprayed with Forest Moss and Frayed Burlap Distress Spray Stains. I then added a paper doll that I popped up with some Double Sided Foam Adhesive. Next I added a couple of Tim Holtz Halloween Baseboard pieces, using the foam adhesive to adhere them and create dimension.
Next, I adhered a couple of ephemera/label pieces. I added machine stitching to the ends of them so they looked like they had been sewn on to the piece. The number 31 is from the Scrapbook.com Modern Number Die Set. I cut it out of Distress Watercolor paper and inked it with Rusty Hinge, Spiced Marmalade and Vintage Photo Ink so that it would coordinate with the Baseboard piece.
The final touch to the scene was the addition of some die cut bats. I used the Scrapbook.com Halloween Bats Dies and cut them from Black Kraftstock. I then applied Black Pops Of Color to give them a shiny textured appearance. Once the Pops of Color was dry, I adhered them with Double Sided Foam Adhesive.
For the title, I die cut the word Lost from Black Kraftstock using the Scrapbook.com Modern Alphabet Die Set. I cut them out 3 times and adhered them together to make the letters more substantial. Next, I applied Distress Collage Medium, allowed it to dry and then applied Distress Crackle Paste. Again, I applied the collage medium so that the crackle would adhere and not fall off. Once the letters were dry, I inked them lightly with Walnut Distress Ink and adhered them to the tag. I then stamped the sentiment "in the inky darkness" using embossing ink and heat embossed it with white embossing powder. I also applied the Distress Collage Medium and a bit of Picket Fence Distress Ink as I did on the trim pieces so that the papers all matched. I trimmed the strip to size and adhered a Hardware head to each end. To give them a slightly aged look, I inked them with some Mushroom Alcohol Ink.
I finished off the tag with a Tim Holtz Vintage Clip. I applied some Distress Collage Medium to it for a little texture and once that was dry, I inked it with a combination of Mushroom Alcohol Ink and a tiny bit of Moss Alcohol Ink.
I appreciate you stopping by to see my Lost In The Inky Darkness Halloween Home Decor Thickboard Tag. I will be switching gears here soon and sharing some Christmas inspiration, but I promise the Halloween inspiration is not complete and that banner I promised is coming soon!
SUPPLIES
Below you can find the products I used to create this project along with compensated affiliate links to Scrapbook.com. These links are at absolutely no cost to you. When you shop through the links below, I receive a small commission from Scrapbook.com. These links are at absolutely no cost to you and the commission I receive helps me cover the costs of my blog and other expenses, which allows me to continue to provide you with FREE inspiration and tutorials. If you want to learn more about what an affiliate link is, you can see my full affiliate and product disclosure statement here. Thank you so much for your love and support!


No comments
Every time you smile at someone, it is an action of love, a gift to that person, a beautiful thing. ~Mother Teresa
HUGS!
JULIANA