Stencil + Scrapbook.com Pops of Color Glitter
On this first card, I placed the Oak Leaves stencil over a piece of Distress Watercolor and used a palette knife to spread Pops Of Color Gold Glitter over the stencil. Pops of Color can be used in so many great ways beside just added dots of color. I then carefully removed the stencil, washed it and set the paper to the side to dry. Using Pops of Color with stencils is one of my favorite options. For more ideas on how to use them, you can check out my 3 Ways to use Scrapbook.com Pops of Color post.
Once dry, I added a bit of stamping using a script stamp and Vintage Photo Distress Ink. Next, I inked the edges with the Vintage Photo Distress Ink and spritzed the paper with my Distress Sprayer. I then used a paper towel to dab the water dry and lift off some of the ink.
I used the Tim Holtz Funky Foliage Thinlits to die cut Distress Heavystock and then inked the various pieces with a variety of Distress Ink colors. I then added them to a Tim Holtz Funky Wreaths and adhered all of the pieces to my card front. The card was finished off with a gold heat embossed sentiment from the Hero Arts Message Strips Stamp Set.
Stencil + Tim Holtz Distress Texture Paste
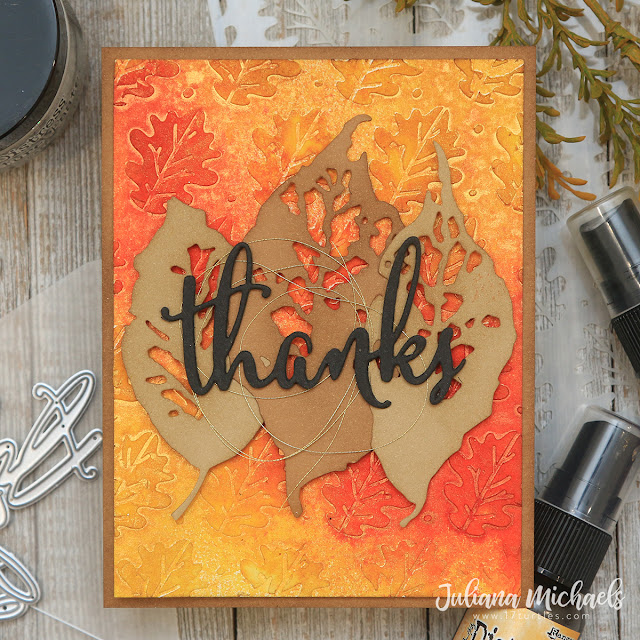
Next up is a new fave that Tim Holtz himself shared during one of his recent Lives to share the new Distress Halloween Collection. Here I placed the Oak Leaves stencil on top of a piece Distress Heavystock. Using a palette knife I spread Distress Texture Paste Matte over the stencil. I then carefully removed the stencil, washed it and set the paper to the side to dry. Once the paste was dry, I sprayed the paper with Distress Mica Stain in Jack O Lantern and Flickering Candle. These products were a limited seasonal release and are now sold out, so I sure hope you managed to grab some before they were gone. They are truly one of my new favorite mediums for adding both color and shine to my projects!
With the background completed, I used the Tim Holtz Leaf Fragments Thinlits to die cut some leaves from a couple different shades of brown paper from the Scrapbook.com Neutrals Paper Pad. I used Vintage Photo Distress Ink to ink the edges.
The sentiment is die cut from black cardstock using the Scrapbook.com Thank You Sentiments Die Set. Before adhering it to the card, I added a bit of gold thread behind it.
Stencil + Dry Embossing
Dry embossing with a stencil is an oldie but a goodie! All you need for this technique is a stencil, a die cutting machine and a silicone rubber pad. I have a Sizzix Big Shot and use the Texturz Silicone Rubber pad. For this card, I once again used the Oak Leaves Stencil and embossed it onto a piece of black paper from the Scrapbook.com Neutrals Paper Pad.
I then splattered the paper with a bit of Scrapbook.com Metallic Rose Gold Ink Refill. To do this, I mixed a drop of it with a bit of water and used a long thin brush to splatter it onto the paper. Once it was dry, I layered on the die cuts. These are the Tim Holtz Skeleton Leaves Thinlits and they are cut out of different colors of glitter cardstock from the Scrapbook.com Mixed Metals Glitter Paper Pad.
To finish off the card, I stamped the sentiment and heat embossed it with gold embossing powder using the Scrapbook.com Botanical Borders Stamp Set.
Thanks so much for stopping by today to celebrate World Cardmaking Day with me and to check out the cards I created using 1 stencil 3 ways.
Finished card sizes: 4.25 x 5.5 inches
Supplies
You can find the products I used to create these projects along with compensated affiliate links to Scrapbook.com. These links are at absolutely no extra cost to you. If you want to learn more about what an affiliate link is, you can see my full affiliate and product disclosure statement here.


Beautiful cards i love all of them... Thank you so much
ReplyDelete