Christmas Card Head Start 2021 | Stenciled Backgrounds with Distress Ink & Foil

Christmas is coming! As I write this post, it's only 271 days away, and of course it will be here before we know it. Last year, I failed miserably at sending out my annual Christmas cards. But, we can blame it all on COVID right?! This year, I don't think I'll have such an excuse or at least I sure hope not, so I thought it would be a good idea to begin what I'm calling my Christmas Card Head Start 2021. My plan is to start creating Christmas cards now so that I'll have a pile of them ready and waiting for me to send out at the beginning of December. Working ahead also gives me time to create one of kind cards for family and friends, play with new techniques and even better...use some stamp sets and other products that maybe haven't gotten the love they deserve.

Christmas Card Head Start 2021

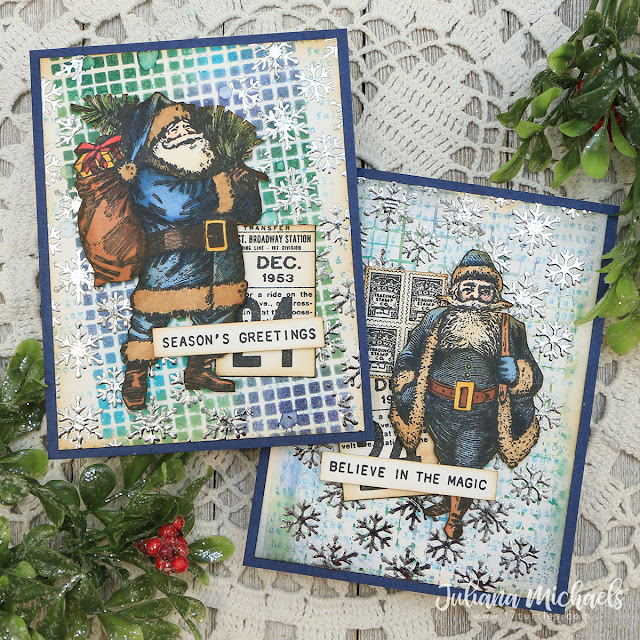
I'm beginning my Christmas Card Head Start 2021 today with these two cards. I created two Stenciled Backgrounds with Distress Ink and Foil and each one uses a slightly different technique. Let me walk you through the steps on how I created each card.

Christmas Cards with Stenciled Backgrounds with Distress Ink and Foil by Juliana Michaels

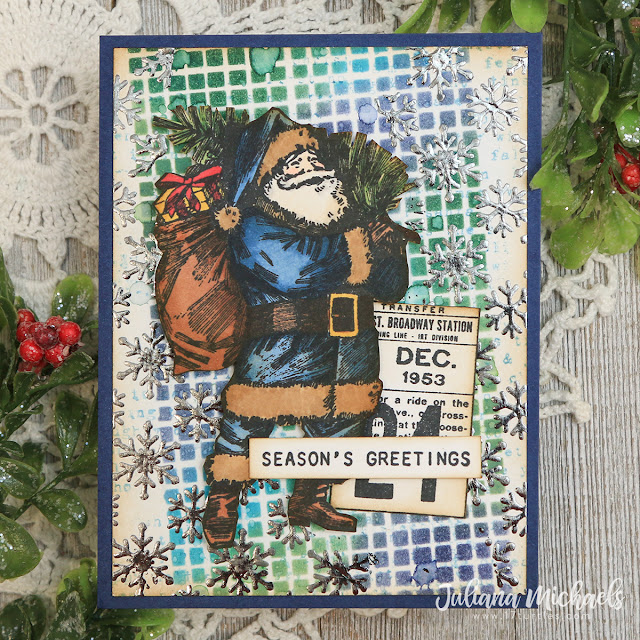
Season's Greeting Christmas Card


Season's Greetings Christmas Card with Stenciled Backgrounds with Distress Ink and Foil by Juliana Michaels

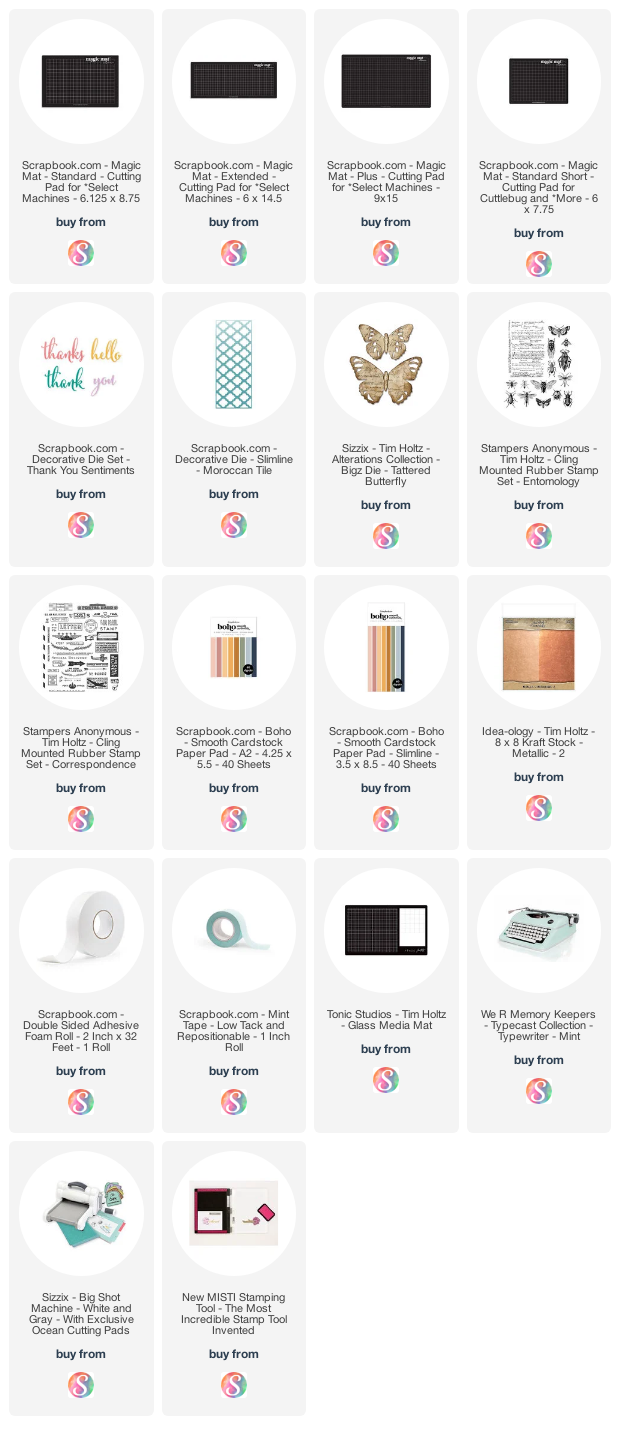
To create this first background I positioned the Linen Layering Stencil onto the smooth side of a piece of Distress Watercolor Paper held in place on my Scrapbook.com Nonstick Silicone Craft Mat with some Mint Tape.

Design Tip: 

The Scrapbook.com Non-stick Silicone Craft Mat is really pretty awesome! I love that it can be used with inks, watercolor, acrylic paint, adhesives, heat embossing, hot glue, and more. It's perfect for protecting your crafting surface and is made of food grade silicone which makes it easy to clean, durable and heat resistant up to 475 degrees Fahrenheit. It doesn't slip around on smooth surfaces and will also lightly grip your paper which makes it wonderful for using with stencils and ink blending as I did on my projects. It 19.5" x 15.5" which was a bit too large for my taste, so I cut it in half. You can learn more about it here.


With the paper securely in place, I inked over it with Distress Ink in Pine Needles and Chipped Sapphire and some Distress Oxide in Rustic Wilderness and Peacock Feathers.


I then spritzed it with my Distress Sprayer to create some droplets and set it to the side to dry.  After creating this background, I actually created the background for my second card using the ink that was left over on the stencil. For now, I'm going to continue explaining how this first card came together but I will explain how I created the second card background below. 


Next, I applied ThermOWeb Deco Foil Transfer Gel over the Flurries Layering Stencil. I immediately washed the stencil to prevent the gel from drying on the stencil. I then set the piece to the side to allow the gel time to dry. Once dry, I covered it with a piece of Pewter Deco Foil and ran it through my Minc to apply the foil to the gel. To decrease the shine of the foil and give it slightly aged effect, I lightly rubbed steel wool over the surface. If you don't have any of the products for foiling, you can also use embossing powder to achieve a similar effect! Simply apply embossing ink over the stencil, remove the stencil, tap off any excess powder and heat emboss it using a heat gun.


Continuing with the background, I wanted to add a little more interest so I stamped the text stamp from the Stripes and Holiday Stamp Set onto the background using Tumbled Glass Distress Ink. I then finished off the background by inking the edges with Vintage Photo Distress Ink.


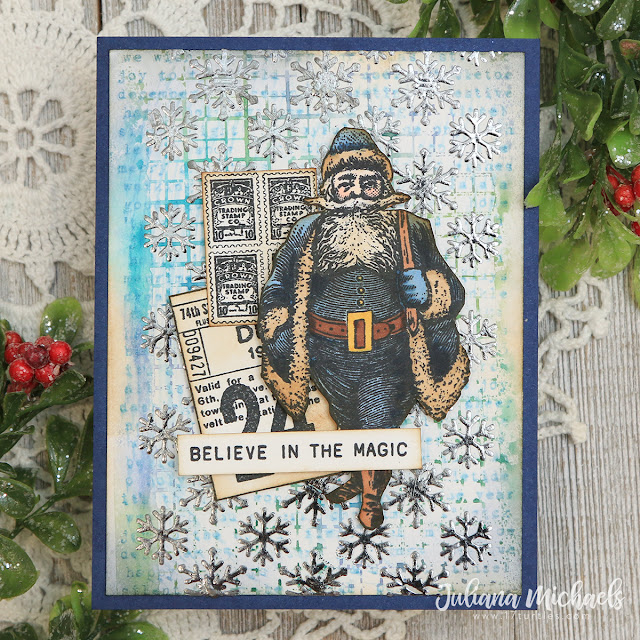
To embellish the card, I stamped then Santa and ticket images from the Vintage Holidays Stamp Set. I colored the Santa with Copic Markers, fussy cut both images and then inked the edges of both pieces with Vintage Photo Distress Ink. I then finished it off with a sentiment from the Tiny Text Christmas Stamp Set. For the final step, I adhered the entire panel onto a piece of cardstock ink blended with Chipped Sapphire Distress Ink to coordinate with the rest of the card.


Believe In The Magic Christmas Card


Believe In The Magic Christmas Card with Stenciled Backgrounds with Distress Ink and Foil by Juliana Michaels

Now let me share we you what I did with that inky stencil from my first card. As I mentioned earlier, the stencil had some ink on it, so I gave it a light spritz with my Distress Sprayer and then stamped it onto a piece of Distress White Heavystock. You could also do this on the smooth side of a piece of Distress Watercolor Paper. While the stencil was still on the paper, I dabbed it with a paper towel to dry up any ink that leaked under the stencil.


I was inspired to give this technique a try after watching the recent Tim Holtz YouTube Live on Distress Sprays. Doing it with Distress Ink, gives you a less bold image as compared to using Distress Spray, but I actually ended up loving the effect. 


As on the first card, I applied ThermOWeb Deco Foil Transfer Gel over the Flurries Layering Stencil. This time, I applied it over the center of the background and then followed the same steps as I did on the first card.


With the foiling completed, I then added a little more interest by once again stamping the text stamp from the Stripes and Holiday Stamp Set onto the background using Tumbled Glass Distress Ink. I then finished by inking the edges with Vintage Photo Distress Ink.


For the embellishment on this card, I stamped the Santa from the Yuletide Stamp Set and the stamps and ticket from the Vintage Holiday Stamp Set. Once again, I colored the Santa with Copic Markers, fussy cut all of the images and then inked the edges with Vintage Photo Distress Ink. The final addition was a sentiment from Tiny Text Christmas Stamp Set.


I hope you enjoyed this bit of Christmas card inspiration and that it gets you thinking about getting ready to begin your own Christmas Card Head Start 2021. Feel free to join me on social media using the hashtag: #christmscardheadstart2021. I'd love to see what you create!

Supplies

Below you can find the products I used to create this project along with compensated affiliate links to Scrapbook.com. These links are at absolutely no extra cost to you. If you want to learn more about what an affiliate link is, you can see my full affiliate and product disclosure statement here.
How To Use Scrapbook.com Pops of Color with Stencils

There are just some products that come onto the market for us crafters that are just so pretty you have to have them and play with them! Well Scrapbook.com Pops of Color is that new product for me! Pops of Color are a liquid embellishment that comes in a rainbow of colors and all but three of the colors have a pearlescent finish. They can be used to create dimensional accents or add a pop of color to just about any project. Using them to create dots of color on projects is one of their more common uses, so of course I wanted to go outside the box a bit and try using them with stencils. There was a bit of trial and error as I figured out the best way to get the BEST results, so today I'm going to share with you how to use Scrapbook.com Pops of Color with Stencils and get fabulous results every time.

How To Use Scrapbook.com Pops of Color with Stencils Set of Easter Spring Cards by Juliana Michaels

When I first tried using the Pops of Color with a stencil, I assumed since this is a thick liquid-like medium that I would be able to apply it over a stencil and be done. That was not my result. The Pops of Color leaked under the stencil regardless of what stencil I used or how much medium I applied. Heavy handed or light handed, it was leaking under the stencil and "ruining" my design. So what's a crafter to do? Figure out a solution! As I mentioned, this involved a lot of trial and error and in the end I found the perfect solution!

During my testing phase, I determined the Pops of Color needed to be mixed with some other medium to thicken it just a tiny bit. The trick was finding something that wouldn't ruin the gorgeous pearlescent finish. I tried every product in my stash and finally discovered the solution...Therm O Web Decofoil Transfer Gel Duo. This gel is white when applied, but dries clear which makes it the perfect product to mix in and maintain the pearlescent finish. I tried tons of other mediums and this one gave me the best and most consistent results every time.


All you have to do is mix a bit of the Transfer Gel Duo with the color of your choice of the Pops of Color. If you want the color to be darker, just add a bit more Pops of Color while your mixing the two mediums together. When you're happy with the color, simply apply the gel over your stencil using a palette knife. 

Designer Tip: Use the Scrapbook.com Silicone Craft Mat to hold your paper in place. You can then use a piece of Mint Tape to hold the stencil in place. This setup keeps your paper and stencil from sliding around as you apply the gel.


Once you have applied the gel, I recommend immediately washing your stencil with soap and water to prevent the gel from drying on your stencil. You will then need to allow the stenciled design to dry for quite awhile. I actually left mine to dry overnight, but I would think it could be dry within an hour unless you applied a super thick layer of the gel.


With the stenciled backgrounds dry, they are ready to be used for your next project. I used the Pops of Color Stenciled Backgrounds I made to create a set of Easter themed cards. Let me walk you through the rest of the steps to create each card.


I used the Pops of Color Stenciled Backgrounds I made to create a set of Easter themed cards. I added some splatters of ink to the backgrounds using a splatter stamp and Distress Ink, but you could also splatter them with ink or paint if so desired. I layered on a die cut wreath from the Funky Wreath Thinlits that I ink smooshed with Bundled Sage Distress Ink.

The next layer is one of the bunnies from the Bunny Hop Thinlits. I inked the edges of these with Spun Sugar Distress Ink and added a bit of interest with a script stamp inked up with Vintage Photo Distress Oxide that I smudged and smeared a tiny bit immediately after stamping. For a fun whimsical touch, I added a white pom-pom inked up with a little Vintage Photo Distress Ink and applied with a Zot. I then finished off each card by adding a sentiment from the Spring Shadows Stamp Set. I added some machine stitching around the edge of each panel and I then layered them onto a piece of cardstock inked with Spun Sugar Distress Ink.

Below you can take a closer look at each card I created. I'm also sharing which Pops of Color and which stencil I used for each card.

Hello Spring Card
Pops of Color: Ocean Waves
Stencil: Vintage Floral


Happy Easter Card
Pops of Color: Soft Lilac
Stencil: Teardrop Floral


Got Candy Card
Pops of Color: Bubblegum
Stencil: Botanical Sprigs


Hello Spring Card
Pops of Color: Seafoam
Stencil: Floral Confetti


Thanks for hopping by today! I hope you enjoyed learning How To Use Scrapbook.com Pops of Color with Stencils!

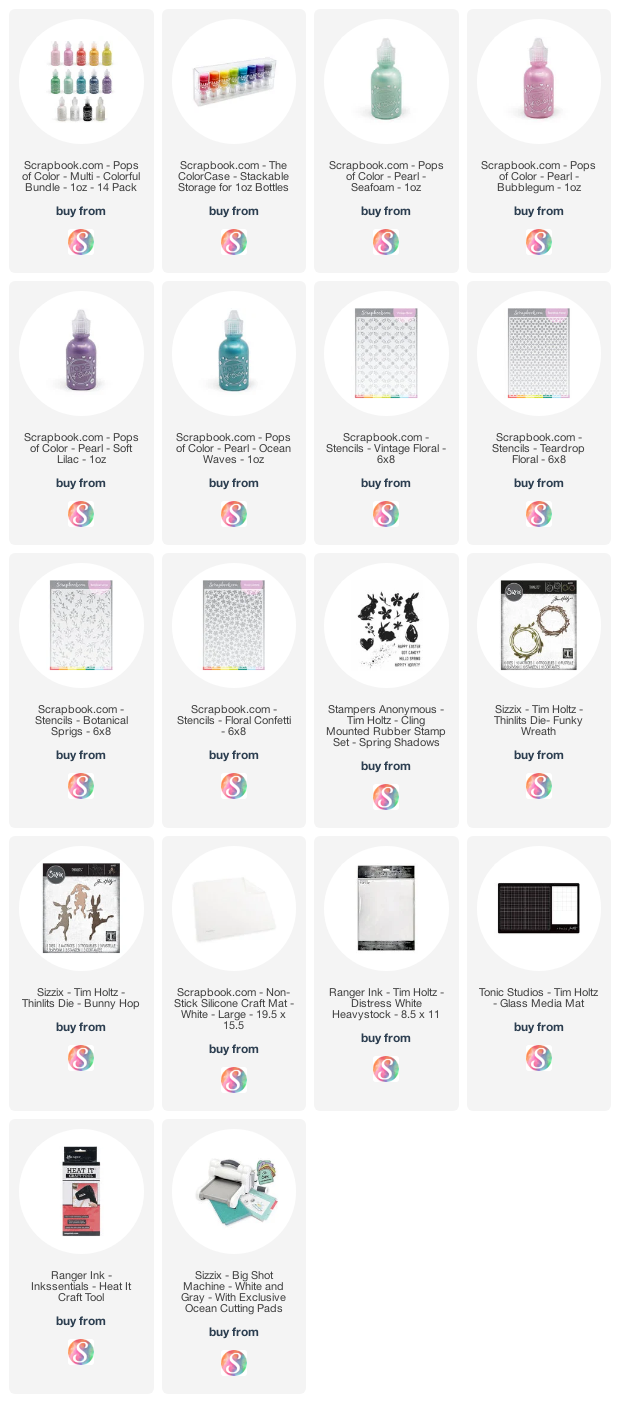
Supplies

Below you can find the products I used to create this project along with compensated affiliate links to Scrapbook.com. These links are at absolutely no extra cost to you. If you want to learn more about what an affiliate link is, you can see my full affiliate and product disclosure statement here.

Slimline Masculine Birthday Cards

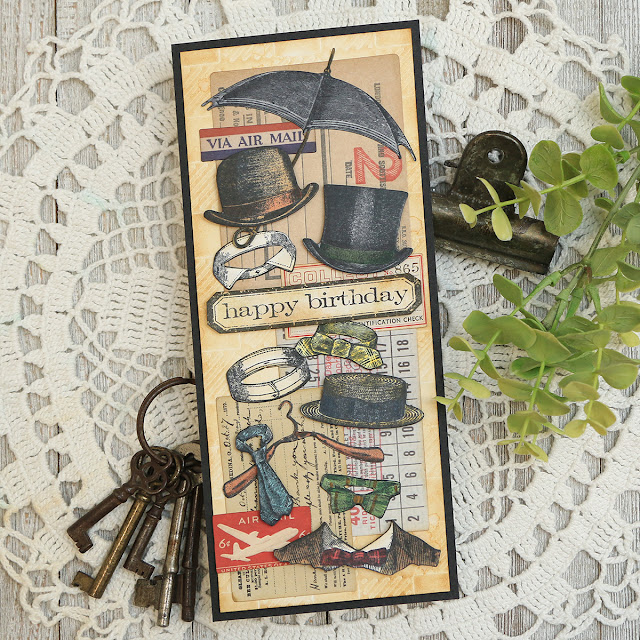
I don't know about you, but I always seems to struggle when it comes to making masculine birthday cards. I'm not sure if it's the lack of masculine themed products that appeal to me or my lack of purchasing masculine themed products, but it's always been something I struggle with. Today, I'm sharing two versions of a slimline masculine birthday card. One is a more detailed, time consuming version and the other is a quick and easy option. Along with the challenge of making a masculine birthday card, time can also be a factor. Sometimes I plan ahead and have time to play and at other times, I'm in a bit of a hurry. Either way, I've got you covered with these slimline masculine birthday cards.

Slimline Masculine Birthday Cards by Juliana Michaels

To get started, let's take a look at the detailed version.

Slimline Masculine Birthday Card by Juliana Michaels

For both cards, I began by stamping multiples of the images from the Tim Holtz Distinguished Stamp Set. If you happen to have the coordinating die set, you can follow the instructions on how to easily die cut and stamp these images here. If you don't own the dies, fussy cutting is always an option.


Once I had a pile of stamped images, I grabbed one of each image and began coloring them with Copic Markers. Feel free to use whatever markers or color medium you prefer and as always, remember to use the right ink and paper for that medium. After I finished coloring each image, I inked the edges with Vintage Photo Distress Ink.


For the background of the card, I used the Scrapbook.com Buffalo Check Slimline Die to emboss a piece of white cardstock. Any metal die can be used for embossing if you use it with a Silicone Rubber Cutting Pad. If you are not totally familiar with this technique, I recommend you do a little research to find out the correct sandwich for your particular die cutting machine.


With the paper embossed, I lightly ink blended over it with Vintage Photo Distress Ink to highlight the embossed design. Next, I layered a few pieces of ephemera and then finished it off with a stamped sentiment using the Tim Holtz Simple Sayings Stamp Set. I then layered everything onto a piece of black cardstock. To add more dimension, I adhered some of the stamped images and the sentiment with double sided foam adhesive.

Slimline Masculine Birthday Card by Juliana Michaels

The second card uses the stamped and die cut images, but I saved a ton of time by not coloring the images. I simply inked the edges with a bit of Vintage Photo Distress Ink.


To save even more time, I made the background super simple by embossing a piece of black cardstock using the Buffalo Check Slimline Die. I also skipped the inking and the use of ephemera.


To finish off the card, I used double sided foam adhesive to pop up some of the stamped images as I adhered them to the card front. All in all, the second card came together very quickly and still has a great masculine feel to it.


Now, you may be thinking, I don't have the dies and I don't have time for fussy cutting. If this is your situation, here's another option for you. Simply stamp the images onto a piece of white cardstock, allowing the images to overlap if desired. Then all you have to do is fussy cut the sentiment piece and pop it up with a bit of double sided foam adhesive.

I hope you enjoyed these Slimline Masculine Birthday Cards ideas and the options of a more detailed, time consuming version as well as a quick and easy option. Thanks so much for your visit and as always feel free to reach out with any questions or just to say hi!

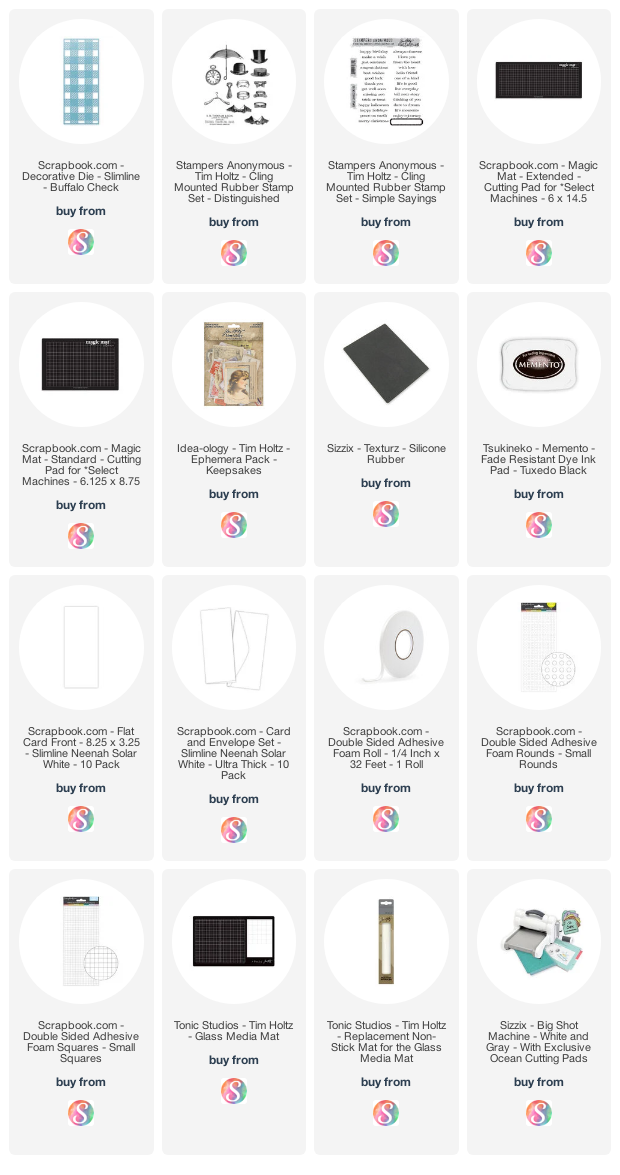
Supplies

Below you can find the products I used to create this project along with compensated affiliate links to Scrapbook.com. These links are at absolutely no extra cost to you. If you want to learn more about what an affiliate link is, you can see my full affiliate and product disclosure statement here.

Lucky St. Patrick's Day Card | Foiling With Stencils

Lucky is a state of mind, and with St. Patrick's Day right around the corner, I was inspired to pull out all the lucky (and green) things I could find.  This St. Patrick's Day Card features a background created by foiling with stencils along with some other fun stamping and die cutting techniques. 

Lucky St. Patrick's Day Card by Juliana Michaels

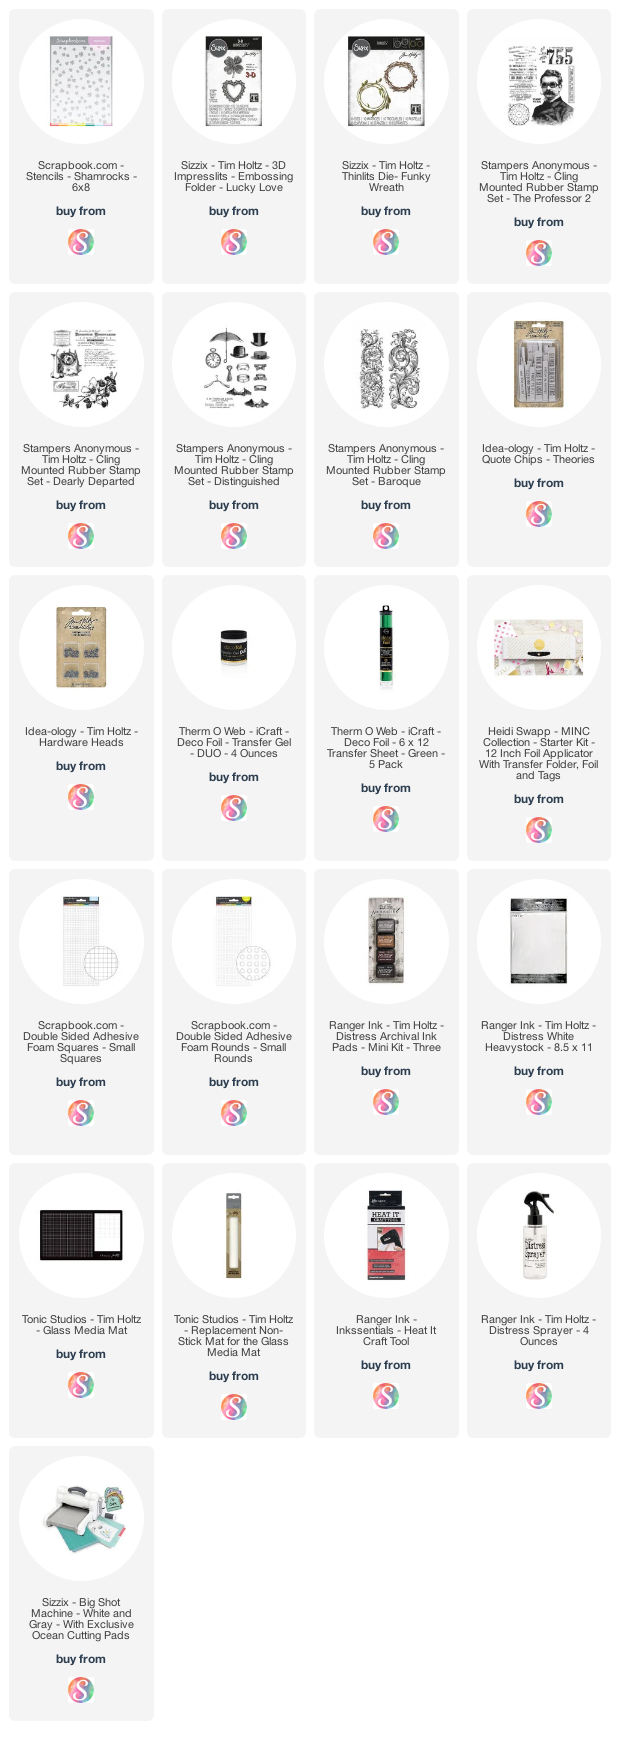
For the background, I began with a piece of Distress White Heavy Stock cut to 4 x 5.25 inches. I placed the Shamrocks Stencil over it using Mint Tape to hold the stencil in place. I then applied a layer of Deco Foil Transfer Gel over the stencil using a palette knife. Once there was a thin layer of gel covering the stencil design, I removed the stencil, washed it and set the card front to the side to dry. Once the gel was dry, I covered it with a piece of Therm O Web Green Deco Foil and ran it through my Heidi Swapp Minc.


With the foiling completed, I decided to add add a little more interest with some stamping. This step could be done before the foiling as well, so keep that in mind. For the stamping, I used the Stamp and Smudge Technique using Distress Oxide Inks. After I stamped each image, I dabbed off the excess ink with a paper towel and then with another clean towel I gently smudged the image. I like to build layers with this technique, making sure the images overlap, but also thinking about color placement as I stamp each one. Sometimes, I even lay out all the images to figure out which ones to stamp where and even what colors to use. The stamps I used can be found in my supply list at the bottom of this post. For the inks, I used a mix of Frayed Burlap, Rustic Wilderness and Mowed Lawn Distress Oxide. Once I was finished with the stamping, I inked the edges with Vintage Photo Distress Ink and added some machine stitching.


With the background completed, it's time to move onto to the focal point...that fabulous embossed four leaf clover! I used the 3D Lucky Love Impresslit to emboss and die cut the shape. I began by dabbing some Rustic Wilderness Distress Ink onto my craft mat and spritzed it with a little water. I then dabbed and smooshed a piece of watercolor paper into the ink, dried it with my heat tool and repeated the process until I was happy with the ink coverage. I then lightly spritzed the back side of the paper using my Distress Sprayer, placed the paper inside the 3D embossing folder and then ran it through my die cutting machine 3 times. The spritz of water and running it through 3 times helps ensure that the design is fully embossed into the paper. I then removed the die cut and allowed it to fully dry. Once dry, I inked the edges with Vintage Photo Distress Ink and added a bit of Aged Bronze Distress Crayon with my finger for a touch of shimmer.


Next, I summoned my inner Zoe Hillman and added a top hat and suit from the Distinguished Stamp Set. I die cut the images from Distress White Heavystock and then stamped the images using Black Soot Archival Ink. You might have noticed that said I die cut and then stamped. I used a technique that Tim Holtz shared during his Holiday 2020 Part 2 Live that is a game changer for stamping and die cutting with Framelits. If you aren't familiar with Framelits, they are dies that coordinate with some of the Tim Holtz stamps. These dies cut right up to the edge of the stamped image so it can be a bit tricky to line things up if you stamp and then die cut as you would normally. And as always, if you don't have the dies, you can always fussy cut the images.
 
With the stamping and die cutting completed, I wanted to add a bit more texture, so I die cut a wreath from Distress White Heavystock using the Funky Wreath Thinlits. I used the same dab and smoosh technique that I used on the four leaf clover, however this time I used Frayed Burlap Distress Ink.
 
To finish off the card, I added a Quote Chip that fit my theme and embellished it with some Hardware Heads that I distressed with some Mushroom Alcohol Ink. I then inked the edges of the Quote Chip with some Vintage Photo Distress Ink and adhered it to my card. For the final step, I created some coordinating cardstock by inking the edges of a piece of Distress White Heavystock with Rustic Wilderness.


I hope you enjoyed learning how this Lucky St. Patrick's Day Card came together with a bit of foiling with stencils, stamping, and die cutting. As always, if you have any questions, please feel to reach out and ask!

Supplies

Below you can find the products I used to create this project along with compensated affiliate links to Scrapbook.com. These links are at absolutely no extra cost to you. If you want to learn more about what an affiliate link is, you can see my full affiliate and product disclosure statement here.
No More Warped Cutting Plates | Why You Need The Magic Mat™ from Scrapbook.com

If you own a die cutting machine and are frustrated about warped cutting plates, then you must check out The Magic Mat™by Scrapbook.com. It's a die cutting game-changer! With The Magic Mat™ there will be no more warped cutting plates. If you aren't familiar with The Magic Mat™ keep scrolling to find out why you need The Magic Mat™ from Scrapbook.com. 

Slimline Cards by Juliana Michaels featuring Scrapbook.com Slimline Dies, Paper Pads and The Magic Mat™

I don't know about you, but I am constantly buying and replacing my plastic cutting plates because they get warped and develop deep etches that occasionally transfer to my projects. Nothing is more frustrating than having to replace my cutting plates after only using them for a couple of weeks. The Magic Mat™ is a replacement for one of your plastic cutting plates, specifically the one that gets cut into. It's made from a recycled, self-healing material that's designed to be cut into over and over when used with blades and cutting tools. So guess what this means? You can say goodbye to warped cutting plates, deep etchings, marks and scratches that may transfer onto your projects. And because you are only using one cutting plate at a time, you will save money as you won't need to replace those as often. To use The Magic Mat™ simply replace your bottom cutting plate with it and start die cutting!

Slimline Cards by Juliana Michaels featuring Scrapbook.com Slimline Dies, Paper Pads and The Magic Mat™

The Magic Mat™ now comes in 4 sizes and is compatible with a wide range of die cutting machines including the Sizzix Big Shot, Spellbinders Platinum, Crafters Companion Gemini, and the Cricut Cuttlebug. For additional features, details on the different sizes, die cutting sandwiches for your machine and all the machines it can be used with, please refer to The Magic Mat™ for Die Cutting article by Scrapbook.com.

Now that you know a little bit more about The Magic Mat™ from Scrapbook.com, let me share a couple of cards I made using this game-changing die cutting tool. It's sure to become your favorite new die cutting tool!

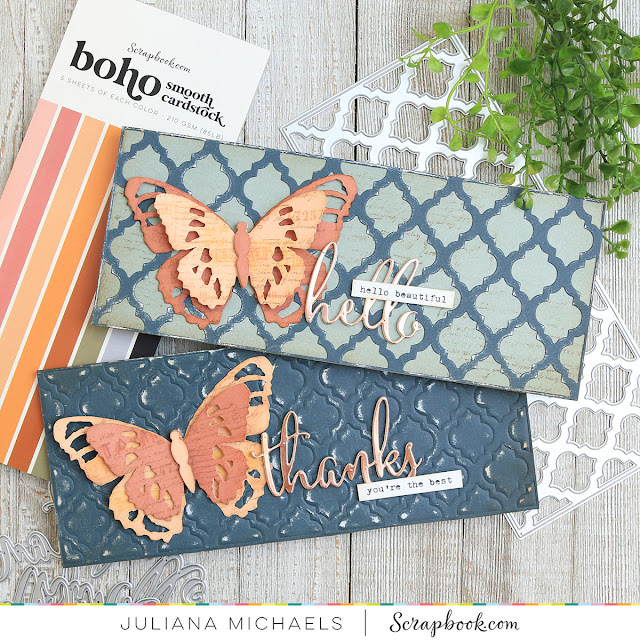
Slimline Hello Card by Juliana Michaels featuring Scrapbook.com Slimline Dies, Paper Pads and The Magic Mat™

On this first card, I used The Magic Mat™ to die cut a piece of paper from the Boho Slimline Paper Pad using the Moroccan Tile Slimline Die. Because the slimline dies are nearly the same size as the slimline papers and to avoid the possibility of the paper sliding as you run it through your die cutting machine, I recommend adhering the paper to the die using a couple pieces of Mint Tape. Simply wrap the tape around the die and paper to hold them together.


I layered this onto another piece of paper from the same paper pad to create the background for my card. Before adhering the layers together, I added some stamping to the base layer using the script stamp from the Tim Holtz Entomology Stamp Set and inked the edges with a bit of Vintage Photo Distress Ink. I also lightly sanded the top die cut layer to reveal a bit of the white core of the paper, adding another bit of texture and interest to the card.


Another great thing about The Magic Mat™ is that is also works with Sizzix Bigz Dies. Again, just replace the bottom cutting plate and run the Bigz Die through your die cutting machine. Here I'm using the Tim Holtz Tattered Butterfly to die cut papers from the Boho A2 Paper Pad. After die cutting the design, I added some stamping using Distress Oxide in Rusty Hinge, Wild Honey, Gathered Twigs and Aged Mahogany. I used stamps from the Tim Holtz Correspondence Stamp Set. After I stamped each image, I lightly rubbed over the still wet ink to smudge it slightly. I love the look of this and if you are interested in learning more about it the Stamp and Smudge technique, feel free to check out my Something Dreadfully Wicked Card.


For the sentiment on each card, I adhered a piece of 2" Double Sided Foam Adhesive to the back side of a strip of Metallic Kraftstock. I then die cut it using the Thank You Sentiments Dies. I just love how the foam adds dimension to the die cuts! And of course it cuts perfectly using The Magic Mat™!


For the second card, I used the same Moroccan Tile Slimline Die, but instead of die cutting with it, I used it to emboss the paper. Yes, you read that correctly, I used the die to emboss the paper!


This time, I placed a Silicone Cutting Pad on top of The Magic Mat™ and ran it through my die cutting machine. You may need to do a little research to find out the correct sandwich for your die cutting machine, but you can emboss with any metal die and The Magic Mat™once again is the perfect tool for this technique.


I again, did a light sanding over the paper to reveal the white core and give the card a slightly distressed feel. The rest of the card is similar to the first card with just a flip flop in colors on the butterfly and a different sentiment.


I then finished off each card with a typewritten sentiment using a manual typewriter. I happen to have a vintage Royal Junior typewriter, but if you don't have a real typewriter you could also use the We R Memory Keepers Typewriter or print it out using your computer and a typewriter font.


I hope you enjoyed learning more about The Magic Mat™ from Scrapbook.com and why you will have no more warped cutting plates when you start using it! 

Supplies

Below you can find the products I used to create this project along with compensated affiliate links to Scrapbook.com. These links are at absolutely no extra cost to you. If you want to learn more about what an affiliate link is, you can see my full affiliate and product disclosure statement here.
Subscribe