Hello friends and welcome to Day 2 of the Gina K Designs Inspiration Blog Hop! Today we're featuring the two new stamp set - Wise Old Owl and Peony Wishes. We are also sharing some inspiration using the new Incentive Stamp Set - Grand Greetings. Just in case you missed it, yesterday during the Day 1 Blog Hop we featured projects using the new BoHo Flowers Mini Stamp Kit.
As always, the Cast and Crew of Gina K Designs will be sharing tons of amazing samples to inspire and delight you. You'll also have the chance to win a fabulous prize from Gina K Designs! You can check out all the details for the blog hop below.
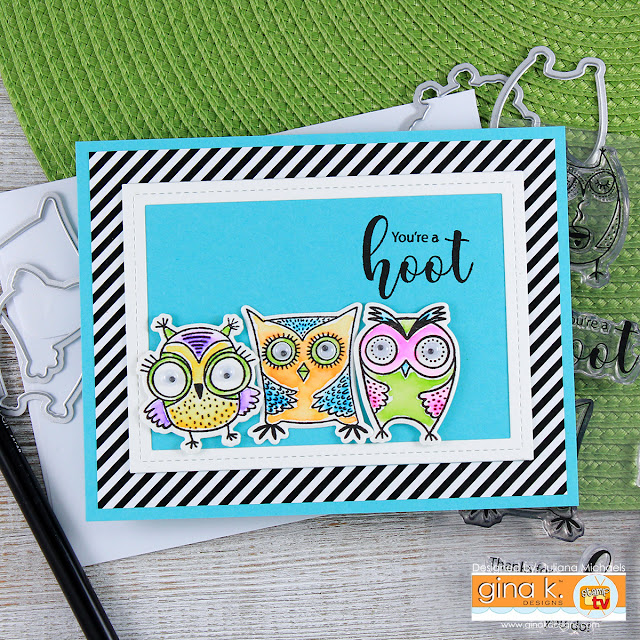
For this first card using the Wise Old Owl Stamp Set, I couldn't resist coloring up those adorable owls with some watercolor markers, die cutting them and then adding googlie eyes! I'm not normally a googlie eye type of gal, but these little guys just begged for them!
These next two cards use the current Incentive Stamp Set called Grand Greetings. To dress up the sentiments, I grabbed two of the new Gina K Designs Stencils. Keep reading to check out a quick tutorial on each of the techniques I used with them.
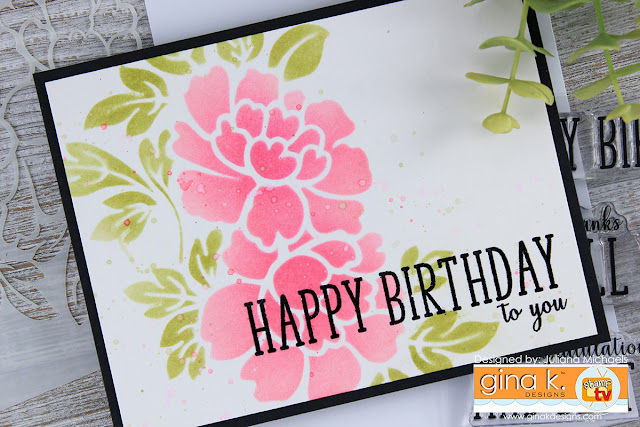
The Gina K Designs Floral Stencil just begged for two colors with its beautiful flowers and leaves. I thought it would be pretty to make the flowers pink and the leaves green.
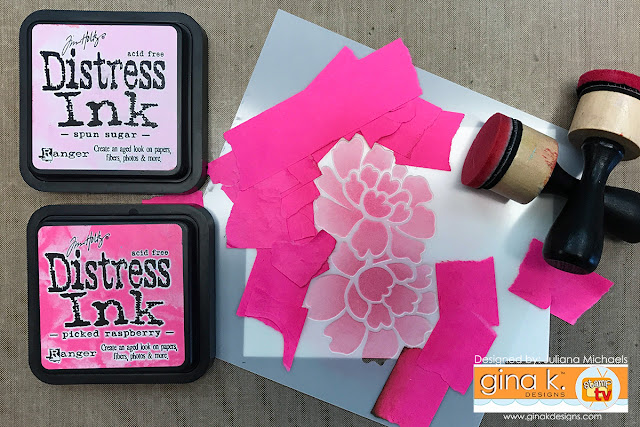
To achieve this look, place your stencil on top of your paper. (I prefer to use watercolor paper when I'm working with Distress Ink.) Use low tack tape to cover the leaves. Make sure none of the flower sections are covered by the tape. Next, add ink to the flower sections using foam blending tools.
Would you like to win a $50 gift certificate to Gina K Designs? If your answer is yes, then all you have to do is visit each blog along the hop (listed below) and leave a comment. One lucky winner will receive a $50 Gina K Designs gift certificate.
Gina K
Beth Silaika
Cathy Tidwell
Chris Dayton
Claire Brennan
Donna Idlet
Juliana Michaels
Karen Hightower
Laurie Schmidlin
Melanie Muenchinger
Rema DeLeeuw
Sean Fetterman
Sheri Gilson
Silke Ledlow
Susie Moore
Theresa Momber
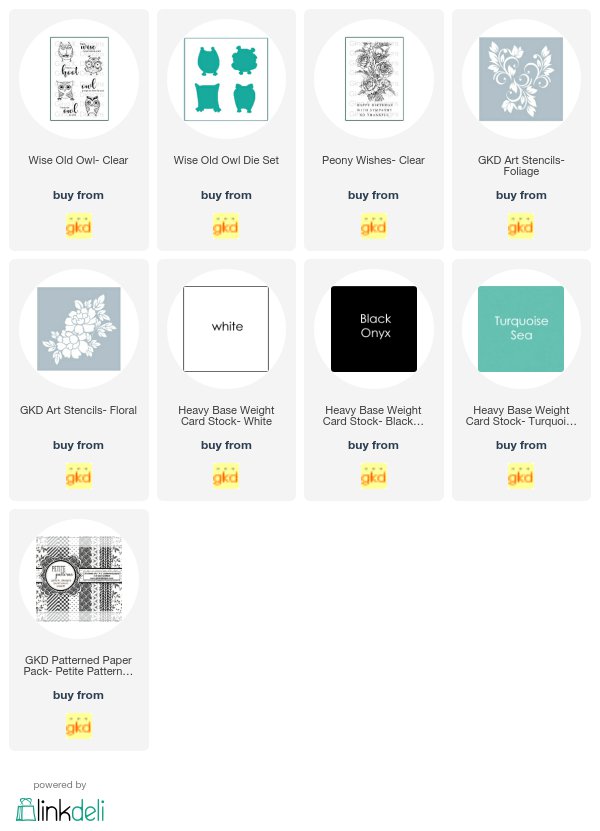
Are you interested in the Gina K Designs supplies I used to create these cards? To make them easy for you to find, I have listed them below. Affiliate links are used at no additional cost to you and I've linked to them because I use them and love them!
As always, the Cast and Crew of Gina K Designs will be sharing tons of amazing samples to inspire and delight you. You'll also have the chance to win a fabulous prize from Gina K Designs! You can check out all the details for the blog hop below.
You're A Hoot Card - Wise Old Owl Stamp Set
For this first card using the Wise Old Owl Stamp Set, I couldn't resist coloring up those adorable owls with some watercolor markers, die cutting them and then adding googlie eyes! I'm not normally a googlie eye type of gal, but these little guys just begged for them!
Do you ever use googlie eyes on your projects? I think I may be doing this again in the future!
With Sympathy Card - Peony Wishes Stamp Set
Next up, I have a little change in direction with a sympathy card that I created using the Peony Wishes Stamp Set. I stamped and colored the gorgeous peony image with colored pencils. I then stamped the sentiment onto black cardstock and heat embossed it with white embossing powder.
To give a touch of elegance, I used an embossing folder on the front panel. I really love the look that white embossed cardstock adds to a card when you're going for a more elegant design.
Bonus Stencil Tutorial
These next two cards use the current Incentive Stamp Set called Grand Greetings. To dress up the sentiments, I grabbed two of the new Gina K Designs Stencils. Keep reading to check out a quick tutorial on each of the techniques I used with them.
1. Two Color Stenciling Technique
The Gina K Designs Floral Stencil just begged for two colors with its beautiful flowers and leaves. I thought it would be pretty to make the flowers pink and the leaves green.
To achieve this look, place your stencil on top of your paper. (I prefer to use watercolor paper when I'm working with Distress Ink.) Use low tack tape to cover the leaves. Make sure none of the flower sections are covered by the tape. Next, add ink to the flower sections using foam blending tools.
Once you're finished adding color to the flowers, it's time to do the leaves. This time, cover the flower parts with the same tape and repeat the ink application process using green ink.
Yes, it's a little tedious to cover up the unwanted areas, however the effort is worth the final result if you ask me!
On this next card, I used the Gina K Designs Foliage Stencil with the Grand Greeting Stamp set.
2. Two Layer Ink Blending with Stencils
For this second technique with stencils, I decided to try something a little different than your standard ink application with a stencil. I thought it would be interesting to see how it would look to do some ink blending first and to then use the stencil on top of this. On this card, I used three different colors of blue ink to achieve a simple monochromatic effect, but you could also just use two ink pads.
Begin by inking the base of the card with two colors of lighter blue ink using foam blending tools. (Again, I used watercolor paper.) You want to apply the lighter colors to the base so that the second layer will show up against the lighter background. I applied Tumbled Glass first and then Salty Ocean to achieve a nice blend of colors.
Now it's time to use the stencil. Place the stencil on top of your paper. This time apply a darker blue ink to the stencil using a foam blending tool.
Go back over the stencil with the middle blue from the ink application that you used during the first round.
I really like the end result of the two layer ink blending and I'm pretty sure I'll be using it again in the future! I hope you enjoyed learning a couple new techniques to help you get even more out of your stencils.
Blog Hop + Giveaway
Would you like to win a $50 gift certificate to Gina K Designs? If your answer is yes, then all you have to do is visit each blog along the hop (listed below) and leave a comment. One lucky winner will receive a $50 Gina K Designs gift certificate.
Beth Silaika
Cathy Tidwell
Chris Dayton
Claire Brennan
Donna Idlet
Juliana Michaels
Karen Hightower
Laurie Schmidlin
Melanie Muenchinger
Rema DeLeeuw
Sean Fetterman
Sheri Gilson
Silke Ledlow
Susie Moore
Theresa Momber
Supplies
Are you interested in the Gina K Designs supplies I used to create these cards? To make them easy for you to find, I have listed them below. Affiliate links are used at no additional cost to you and I've linked to them because I use them and love them!


I enjoyed looking at what you created, and thank you for the tutorial also.
ReplyDeleteBeautiful cards. Thank you for the stencil tutorial.
ReplyDeleteGreat cards. Thanks for the tutorials. Love the multi-colored owls.
ReplyDeleteWonderful cards. The flowers cards are beautiful and the owls are so cute. Thanks for sharing....
ReplyDeleteI love the colors you used for your cards! Thank you for sharing!!
ReplyDeleteBeautiful samples and thanks for sharing your stencil technique.
ReplyDeleteAhhh... such gorgeous eye candy! Love the brightly colored owls with their fab googly eyes!!
ReplyDeleteBeautiful sample of work with lovely tutorial!
ReplyDeleteLove your colorful owls! And thanks for the stenciling tips!
ReplyDeleteWonderful colors! Thank you for sharing!
ReplyDeleteBeautiful colors love the owls what a hoot!
ReplyDeleteBeautiful cards! Thanks for sharing!
ReplyDeleteLovely cards.
ReplyDeleteLovely cards!
ReplyDeleteBeautiful cards, love your stenciling techniques.
ReplyDeleteDolores
Thanks for the videos of your stenciling Technics. Love them.
ReplyDeleteI like all your cards! You added such neat touches to them to really make them shine - the embossed background, the blended backgrounds, just gorgeous! Thanks for sharing!
ReplyDeleteWonderful work on all of these and I love how you showed the way you used the stencils too.
ReplyDeleteGreat designs and thanks for the tutorial!
ReplyDeletePure gorgeousness and love the tutorial:)
ReplyDeleteBeautiful cards and great tutorial! Thank you for sharing!
ReplyDeleteI have google eyes, but never remember to use them! Thanks for the stencil tutorial. Just beautiful!
ReplyDeletebeautiful! love how you used the stencils and the tutorials!
ReplyDeleteGotta love those googly eyed owls! They are adorable! All of your cards were wonderful! Thanks so much for sharing!
ReplyDeleteLove the googly eyes! I use them at times and they are fun. Thanks for the stencil tutorial. I plan to use it soon.
ReplyDeleteThe pencil card is so gorgeous!
ReplyDeleteI like how you designed your cards!
ReplyDeleteGreat designs and I enjoyed the tutorial as well
ReplyDeleteBeautiful colors love the owls what a hoot!
ReplyDeleteBeautiful Peony card is beautiful and those goggly eyes are so cute on this owls! :) I love how you did the stenciled cards as well! <3
ReplyDeleteThe googly eyes were great. Thanks for the tutorial.
ReplyDeleteGreat work. Love the addition of the eyes on the owls. It adds such a playful touch.
ReplyDeleteThanks for the wonderful tutorial. The stenciling is beautiful and I agree it is worth the effort covering the different parts to use different colors. The googly eyes are so cute on the little owls.
ReplyDeleteLove the cards and the wonderful tutorial on the stenciling.
ReplyDeletePretty cards! Thanks for the stenciling tips too - lovely results!
ReplyDeleteAll the cards are beautiful. Thanks for the tips.
ReplyDeleteLovely cards. Thanks for the tutorial on stenciling...love the finished look!
ReplyDeleteBeautiful cards! Thanks so much for the inspiration and the tutorials.
ReplyDeleteOh my! Love, love, love these stamps and all the creativeness of the blog hop - thank you!!
ReplyDeleteVery nice and helpful post, thanks for that. And congratulations for all your pretty cards !
ReplyDeleteThank you for using the stencils! been wanting to see how they could be used! love how you used them.
ReplyDeleteFabulous cards! Love the stencil tutorial too!
ReplyDeleteThese are WOW cards. WOW..
ReplyDeleteThe owls are wonderful!
ReplyDeleteWonderful cards, all of them!
ReplyDeleteLovely work, the owls are way too cute!
ReplyDeleteI absolutely love your cards! Your pencil coloring of the peonies is gorgeous!
ReplyDeleteLove the stenciling instructions! Great job.
ReplyDeleteWonderful cards and techniques. Love the googly eyes on the owls.
ReplyDeleteGreat cards and tutorials...so pretty! I love the googlie eyes on the owls...too cute!
ReplyDeleteOh my gosh, those owls are so stinkin' CUTE! And I love what you have done with those peonies, not to mention the beautiful Grand Greetings. Thanks for all the great inspiration and for the great tutorial!
ReplyDeleteSuch beautiful cards. Wonderful coloring.
ReplyDeleteFantastic card designs love those colorful owls
ReplyDelete