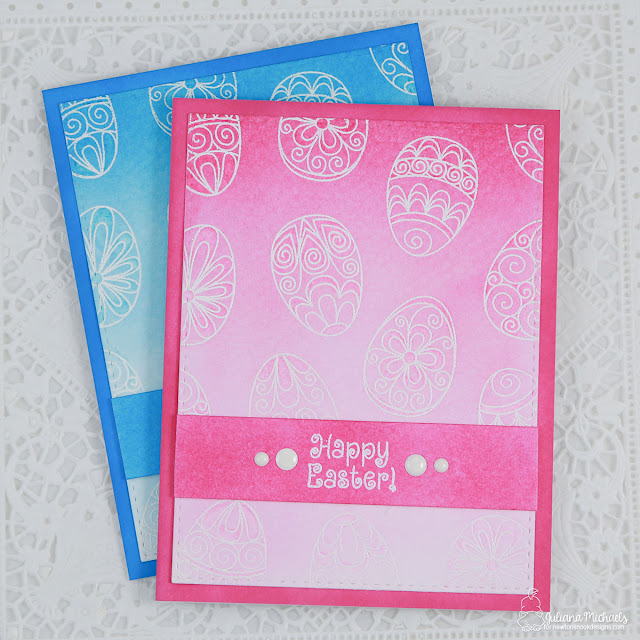
Hello friends! Today I'm sharing a couple of Easter cards I created using the Beautiful Spring stamp set by Newton's Nook Designs. I just love the swirly designs that look so much like paper quilling!
I'm also sharing my take on the Ombre Background that was recently shared by Jenifer McGuire. Her cards really inspired me however, after playing around with things a bit, I came up with a different take on the technique and I wanted to share it with you.
Creating beautifully blended backgrounds with Distress Inks can be a bit of a challenge. Many of us tend to get harsh edges when we apply the ink and they don't turn out looking soft and pretty. I have also had my arm get tired as I'm applying the ink! The technique I'm sharing today will help you achieve create a perfect blended result every time you work with Distress Inks.
I put together a short video that walks you through my technique for creating the ombre background.
You can check out my video below or watch it on YouTube.
In my video I show you how to create an ombre background using watercolor paper, Distress Inks and foam blending tools. I have to admit, the Clarity brushes look amazing to work with, however, they really aren't in my budget so I wanted to find a way to create this same look for less.
After lots of trial and error, I've found the key for creating a perfect Distress Ink blended background - watercolor paper! I use Strathmore 400 series and I consistently achieve great results when I use it with Distress Inks, watercolor paints and watercolor markers such as Zig Clean Color.
When I use watercolor paper I never get those harsh ink edges from the blending tools. The ink doesn't soak into the paper right away, which gives you time to work with it and blend the ink and even better...your arm doesn't get tired from the blending!
I created the same card using different colors of ink. Just think of all the possibilities...green, orange, purple!
The sentiment is stamped on watercolor paper as well that was colored with Distress Ink. I heavily applied the ink to get the solid color. I also created the coordinating card front using regular cardstock. I didn't bother with watercolor for this piece because I wasn't worried about blending or trying to achieve an ombre look.
So, now it's your turn! Are you ready to create a perfect ombre ink blended background every time?!
Supplies:
Stamp Positioning Tool - Hampton Art Stamp Perfect
Stamp Positioning Tool - Hampton Art Stamp Perfect
Watercolor Paper - Strathmore 400 Series
Embossing Powder - American Crafts Zing White
Heat Gun
Enamel Dots - Doodlebug Lily White Sprinkles
Stamps and Dies - Newton's Nook Beautiful Spring Stamp Set and Beautiful Spring Die Set
Manual Die Cutting Machine - Cuttlebug
Cardstock - Core'dinations Premium Cardstock 110lb White


Lovely cards!! Love your video and the watercolor paper!
ReplyDeleteSuper cute cards!
ReplyDeleteI love the look of the ombre and really appreciate you sharing how to do it without a major arm workout!
ReplyDeleteSo pretty! LOVE the blended background!
ReplyDeleteThese are so beautiful! I will have to try the watercolor paper for distress blending since I always have the trouble with not getting smooth edges! Thanks for the tip and the awesome video!
ReplyDeleteJen