Same Stamped Design - 2 Different Techniques

Hello all! A couple of months back, I ordered some stamps from Honey Bee Stamps.  This was a new to me company, and they had just released some gorgeous new stamps that I wanted to use to create and some cards to a call for CardMaker Magazine. Well, I'm pleased to share that several cards using these stamps will be published in the upcoming Summer 2017 Issue of Cardmaker Magazine. 

Since getting the stamps, I haven't stopped playing with them. They have become one of my favorites because of the gorgeous floral designs and how they lend themselves so beautifully to coloring.

While creating with these stamps, I decide to create 2 cards using the exact same design, but to use very different techniques and colors on each one to show just how different the same design can turn out by making such small changes.

Bless You Card with watercolor and heat embossing by Juliana Michaels featuring Honey Bee Stamps

I laid out the design using my MISTI stamp tool to help determine the placement of the floral stamps and the sentiment.  The bottom stamped image is the border stamp from the set. I didn't want to have the exact same image across the top, so I positioned the individual flowers to create my own border design for the top of the card. I then stamped the floral image using Versamark Embossing Ink and heat set it with white embossing powder.

Next, I stamped the sentiment with black ink.  Using my Zig Clean Color Real Brush Markers, I colored in the flowers using a mix of purples and blues.  I used a small paint brush and water to help blend the colors.

Using the exact same stamp layout, thanks to my MISTI, I stamped the same image using black ink. I then colored it in with a mix of primary colors using my Zig Clean Color Real Brush Markers.

Bless You Card with watercolor by Juliana Michaels featuring Honey Bee Stamps

I love the striking difference between the two designs. One being more soft and delicate and the other being a bit more bold.

Now it's your turn.  I challenge you to give this technique a try and see just how differently the same design can turn out with your stamps.

Are you interested in any of the products I used to create these cards? A full supply list can be found below. Where available, I use affiliate links. If you make a purchase after clicking, this means I'll receive a small commission at no extra cost to you. Thanks so much for your support!

Supplies:
Honey Bee Stamps - Zen Floral Clear Stamp Set
Honey Bee Stamps - Bless Your Heart Clear Stamp Set
Zig Clean Color Real Brush Markers
Strathmore Watercolor Paper
American Crafts Zing White Embossing Powder
Ranger Archival Ink - Jet Black
Versamark Embossing Ink
MISTI Precision Stamper Stamping Kit

Gina K Designs + Cardmaker Blog Hop | Christmas Card Ideas

Hello everyone and welcome. Today I'm sharing some Christmas card ideas using the Gina K Designs Home for the Holidays StampTV Kit as part of the Gina K Designs and Cardmaker Magazine Blog Hop. This is my first time creating with products from Gina K and I must say I absolutely love them! The Kit comes with 4 clear stamp sets, coordinating dies, a 6x6 patterned paper pack, and 24 sheets of cardstock. Other than ink, adhesive and envelopes, you have everything you need to create all your Christmas cards. However, what really made me smile with glee was that all of this comes in a fabulous plastic storage box - which totally makes this organization and storage lover super happy!

I was immediately drawn to the adorable Santa and Snowman stamps in the Christmas Magic stamp set. I stamped, die cut and then colored them with my Prismacolor pencils. To create the snow hill,  I used a fun technique for Faux Stitching that I learned from watching one of the fabulous StampTV videos.

Merry Bright Christmas Card by Juliana Michaels featuring Gina K Designs Home for the Holidays StampTV Kit

I then stamped the snowflakes onto a piece Turquoise Sea cardstock with Versamark. Once it was dry, I drew over them with a Stardust Gelly Roll Pen to add a touch of shine. I also stamped the sentiment with Versamark, but I heat embossed it with white embossing powder to help it stand out a bit more. I then adhered the die cuts onto the piece with double sided foam tape and attached it to the front of the card.

Merry Bright Christmas Card by Juliana Michaels featuring Gina K Designs Home for the Holidays StampTV Kit

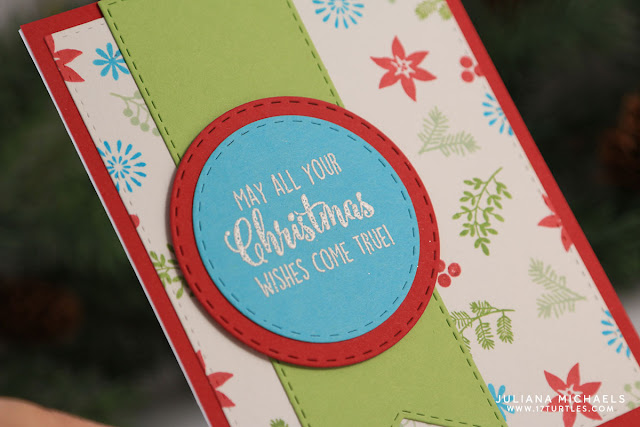
On my second card, I went a little more simple and didn't do any coloring. I used the Christmas Greenery Stamp set to create a festive background by stamping some of the flowers and leaves onto a piece of Ivory cardstock with various colors of ink.

Christmas Wishes Card by Juliana Michaels featuring Gina K Designs Home for the Holidays StampTV Kit

I then stamped the sentiment using Versamark Ink onto the Turquoise Sea cardstock and heat embossed it with white embossing powder.

Christmas Wishes Card by Juliana Michaels featuring Gina K Designs Home for the Holidays StampTV Kit

Christmas will be here before we know it and thanks to the Home for the Holidays Kit from Gina K Designs, I've got a great start on making my Christmas cards this year.

• • • • • • • • • • • • • • • • • • • • • • • •

Blog Hop Details

The blog hop officially starts on the CardMaker blog. If you're hopping along you should have arrived here from the blog of Chris Dayton. For those of you just joining the party, I've included the entire hop list below:


And now for some awesomeness ...  Gina K Designs is having a giveaway! Leave a comment on the Gina K blog for your chance to win a $25 gift certificate to their online store! The winner will be announced on their blog on Friday morning. 

Jillibean Soup + CardMaker Blog Hop | Shape Shaker Card Tutorial

Hello everyone and welcome! Today I'm sharing two festive Christmas shaker cards. I created these cards for the CardMaker and Jillibean Soup Blog Hop using the new Holiday Shape Shakers by Jillibean Soup! You'll find all the blog hop details below. First, let me share a bit about these fun products.

If you aren't familiar with Jillibean Soup Shape Shakers, let me tell you a little bit about them. They are a super quick and easy way to make the popular shaker cards you are seeing all over the place these days. Most methods for making a shaker card can get a little confusing and time consuming. Jillibean Soup has taken all that stress away and turned them into a fun and easy project that anyone can create!

Jillibean Soup Holiday Shape Shaker Card Ornament by Juliana Michaels

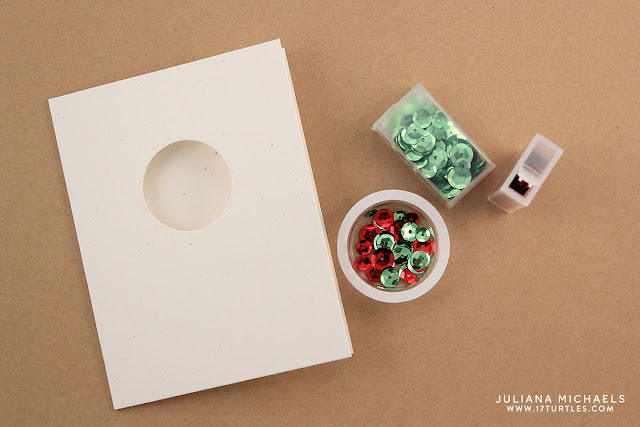
Begin by selecting one of their die-cut card bases. They have several shapes that include a small circle, a large circle, a square, a jar, a cloud and a star. Each of these cards has an opening already cut into them. The cards also come with envelopes and they are sized to large enough to fit the shakers. For this card, I used the Small Circle Card Base.

Next, select some stamps to decorate your card. On this card,  I used the new Ornament Stamp Set which is made to work perfectly with Small Circle Card Base. I stamped the ornament using red ink and did some gold heat embossing when I stamped the hanger and sentiment.

Jillibean Soup Holiday Shape Shaker Card Tutorial by Juliana Michaels

Next, select the coordinating Shape Shaker. For this card, I used the Small Circle Shape Shaker. This is a plastic shape that has adhesive around the outside edge and it will become the shaker part of the card.

Now the fun begins! Fill the shaker with sequins, small beads, die cuts or even a stamped image. Designer Tip: Before you fill the shaker, rub it with a dryer sheet or cotton ball soaked with rubbing alcohol. This will help decrease the static when you add the sequins.

Jillibean Soup Holiday Shape Shaker Card Tutorial by Juliana Michaels

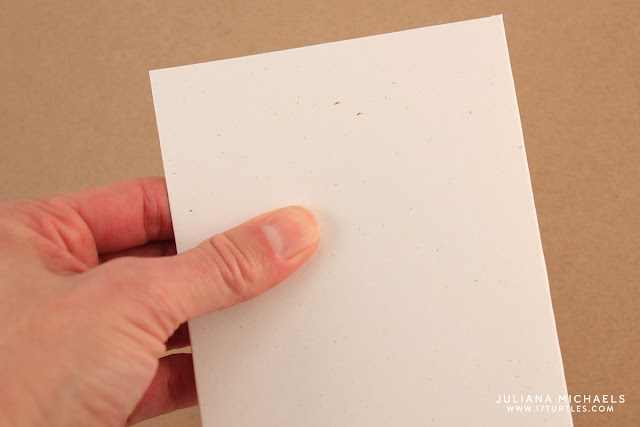
Open the card all the way. Place the filled shaker into the opening on the card. 
Jillibean Soup Holiday Shape Shaker Card Tutorial by Juliana Michaels

Remove the adhesive backing, and carefully lift up the card and filled shaker. 

Jillibean Soup Holiday Shape Shaker Card Tutorial by Juliana Michaels

Carefully close the card by bringing the back side of the card toward the side with the filled shaker. Rub your fingers around the plastic shaker to adhere it the the card.
Jillibean Soup Holiday Shape Shaker Card Tutorial by Juliana Michaels

Turn your card over and enjoy your festive holiday shaker card!

Jillibean Soup Holiday Shape Shaker Card Ornament by Juliana Michaels

There are so many fun ways to create and play with the Jillibean Shape Shakers. Here is another shaker card I created using their Jar Card Base, Jar Shape Shaker, and Jar Die Set.


Instead of stamping on the card front, I used the Jar from the Jar Die Set to die cut a piece of patterned paper to fit the opening of the Jar Shape Shaker. To help me determine where to position the die, I used the card as a template.

Jillibean Soup Holiday Shape Shaker Card Jar by Juliana Michaels

The stamps on this card are from the Snow Globe stamp set. I stamped the sentiment and image on the inside of the card. I then filled the shaker with sequins and adhered it to the card. For the final touch, I added a little jute bow.

Jillibean Soup Holiday Shape Shaker Card Jar by Juliana Michaels

So, who is ready to start making one of these for all your family and friends this holiday season?

• • • • • • • • • • • • • • • • • • • • • • • •
Blog Hop Details

The blog hop officially starts on the CardMaker blog. If you're hopping along you should have arrived here from the blog of Jeanne Streiff.  For those of you just joining the party, I've included the entire hop list below:

And now for the good stuff...Jillibean Soup is having a giveaway! Make sure to leave a comment on each blog for your chance to win an awesome prize featuring some of their new Holiday Shape Shakers!
Subscribe