Dollar Tree Halloween Wreath

Happy Halloween friends! Even though today is Halloween, I still wanted to share with you a Halloween wreath I made using some fun finds from my local Dollar Tree. I figured it's better late than never when it comes to sharing some of the crafty projects I created this year for our Halloween party. I know you won't have time to create one this year, but you can always Pin it and save them for next year!

Dollar Tree Halloween Deco Mesh Wreath by Juliana Michaels

I started with a wire wreath form from my stash. This one is 18 inches. I then followed this great tutorial on how to make a Deco Mesh wreath form.  The rest of the supplies came from Dollar Tree, with the exception of some small plastic glitter spiders I found at Party City.

Dollar Tree Halloween Wreath Supplies:
3 Rolls Mesh - 2 purple, 1 black
2 Black Halloween Garland
2 Rolls of Ribbon
2 Stems Black Roses
Spider Web
Orange Glitter Spider
Plastic Skeletons
Orange Sparkly Pipe Cleaners

Dollar Tree Halloween Supplies

Following the tutorial, I attached the 3 rolls of Deco Mesh using the orange sparkly pipe cleaners. I was ok with the sparkly orange showing, but if you don't want them to be seen, then you might want to use black pipe cleaners. 

Next, I tool the 2 Black Halloween Garlands and removed all the jack o'lanterns. They are twist tied to the garland and I kept them for a possible future project. I hate to waste anything! I then weaved both of these in between the mesh to fill in the wreath even more.

Now it's time to add the ribbons. I wrapped them, one at a time, around the wreath and used the pipe cleaners to tie them in place on the back side of the wreath.

Dollar Tree Halloween Deco Mesh Wreath by Juliana Michaels

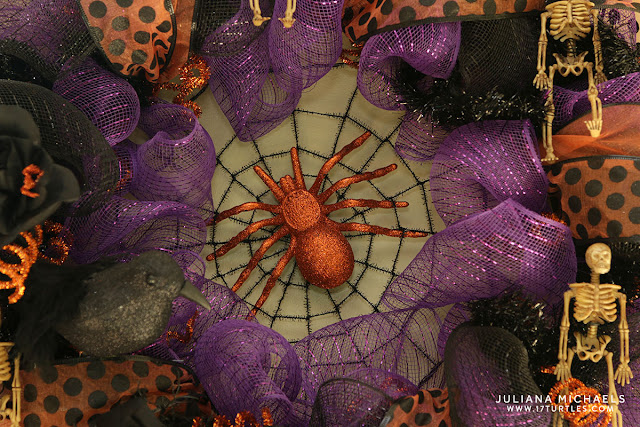
Once the base was completed, I began to decorate the wreath.  I used some black twist ties to attach the skeletons. The roses are held in place using some of the orange pipe cleaners.  I used a hot glue gun to attach the small plastic spiders.

The large spider web in the center of the wreath originally came with a glow in the dark spider, but I removed it and replaced it with the orange glitter spider. I then attached it to the wreath using the pipe cleaners.

After all my goodies were attached, I took the remaining orange pipe cleaners and wrapped them around a coloring marker to create a coil. I then attached these to the wreath to add a little more bling.

Dollar Tree Halloween Deco Mesh Wreath by Juliana Michaels

You might have noticed the "Witch Is In" sign in the supply picture above. I had originally planned to use that on the wreath, however as I started putting it all together, I decided to go with the spider web and glitter spider in the center.

I hope you enjoyed learning how to create your own Dollar Tree Halloween Wreath! Remember to pin this for next year. Dollar Tree usually stocks their Halloween products shortly after school starts in the fall.  I recommend keeping an eye out for them and to get there early for the best selection. Happy crafting!


Halloween Papermache Tombstone Centerpiece

Long time, no post. Well, I have an excuse. I've been a tad busy the past few weeks getting ready for our annual Halloween party, which was this past weekend. I love Halloween and I love decorating for Halloween. And as you know, I also love to create stuff, so I usually end up making a lot of my decorations for the party.  Every year I seem to create and add a few more things. This year I decided to create a center piece for our island.  While looking for ideas, I came across this set of paper mache tombstones at my local craft store and knew they would be the perfect thing.

Halloween Tombstone Graveyard Centerpiece by Juliana Michaels

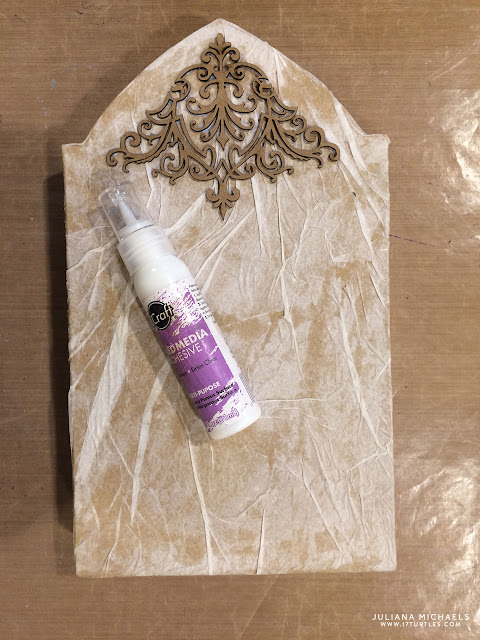
I began by covering each of them with tissue paper. I wrinkled it up really good and then glued it to each one using a foam brush and matte medium.  Some other options would be Mod Podge or even watered down Elmer's Glue. You want to use some sort clear drying liquid adhesive that spreads easily.

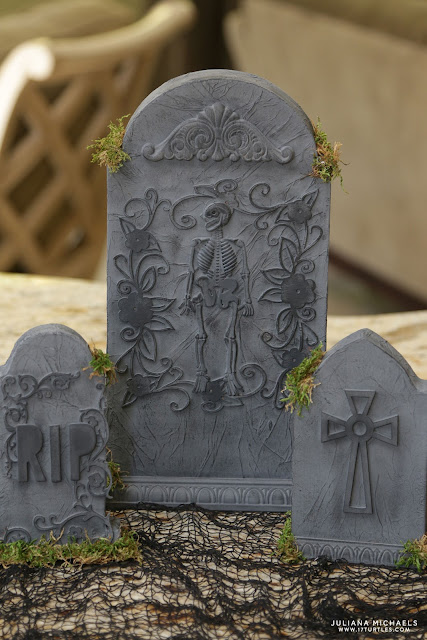
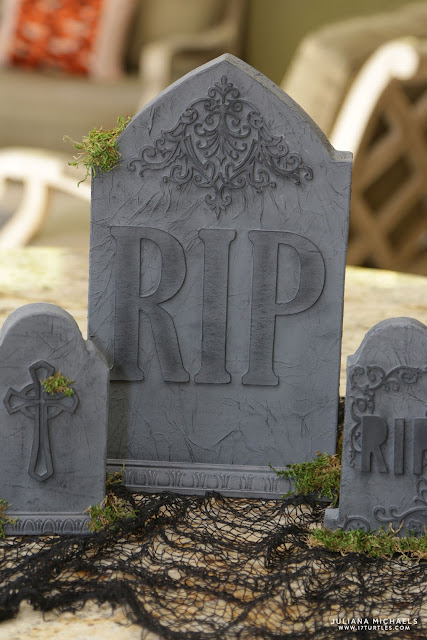
To give the tombstones some character, I went through my stash of chipboard, wood shapes and Halloween crafting supplies. I found some wood crosses, chipboard letter stickers, decorative chipboard flourishes, a decorative wood applique, a plastic skeleton and some wood molding. As I was laying out what I wanted on each tombstone, I realized I needed something more, so I cut out the large RIP from chipboard using my Silhouette Cameo. I cut 2 of each letter and glued them together to give it more dimension.

Once the glued on tissue paper had dried, I adhered the various pieces of chipboard, wood and plastic from my stash using Therm O Web's Mixed Media Liquid Adhesive.

Halloween Tombstone Graveyard Centerpiece by Juliana Michaels

The next step was to paint each of the tombstones with gray acrylic paint. Once this was completely dry, I dry brushed black acrylic paint onto each piece to help bring out the details. If you aren't familiar with dry brushing, here are some pointers: 
  • Make sure to use a stiff and dry brush.
  • Dip your brush into the paint, but try not to get a lot of paint onto the brush.
  • Wipe the paintbrush onto a piece of scrap paper or some other surface to remove more of the paint.
  • Lightly wipe the brush onto your surface to apply the paint.
You basically end up with hardly any paint on the brush. This is what you are going for. This allows you to bring out the detail and texture in the pieces you are dry brushing. And, you can always add more if you want it a little darker.


Halloween Tombstone Graveyard Centerpiece by Juliana Michaels

Halloween Tombstone Graveyard Centerpiece by Juliana Michaels


Halloween Tombstone Graveyard Centerpiece by Juliana Michaels

Halloween Tombstone Graveyard Centerpiece by Juliana Michaels

For the final touch of graveyard fun, I added some sheet moss to the edges and crevices of the tombstones using a hot glue gun.
Halloween Tombstone Graveyard Centerpiece by Juliana Michaels


Halloween Tombstone Graveyard Centerpiece by Juliana Michaels

I love how the wrinkled tissue paper gives them a faux stone look. By dry brushing them with the black paint it really enhanced the wrinkles and brought out the texture and detail on all the decorative pieces I glued onto the tombstones.

Halloween Tombstone Graveyard Centerpiece by Juliana Michaels

Here you can see them in action the night of the party. I really love how they turned out and how they added some ghoulish fun to the center of the island!

Halloween Tombstone Graveyard Centerpiece by Juliana Michaels

I hope you enjoyed learning how to create your own Halloween Papermache Tombstone Centerpiece. Thanks for stopping by today!

Halloween Tombstone Graveyard Centerpiece by Juliana Michaels

Halloween Mixed Media Shadow Box | Starting from the Same Place

Hello and welcome! Today, I'm excited to share a mixed media Halloween Shadow Box I created as part of a huge artist collaboration organized by Tina Walker and Susan Brown called "Starting From The Same Place".  Nearly 60 artists are participating today to share what we each created using a package of the same products. To see what we were sent, check out the image below and see if you can locate each piece in my project.

The theme of the challenge was to create anything we wanted, but we had to use all of the stuff that was sent to us. We could supplement with anything from your own stash and all types of projects were welcome.

When I first received my package I was struck by the darkness of the colors and I immediately thought Halloween! I quickly gathered my stash of Halloween products to add to the package we were sent and I started going to town inking, painting, stenciling, die cutting, stamping, glittering and embossing.

Halloween Mixed Media Shadow Box featuring Jillibean Soup Mix the Media 8x8 Wood Plank and Donna Salazar Art Doll Spellbinder Die by Juliana Michaels

The base of my project is the back side of a Jillibean Soup Mix the Media 8x8 Wood Plank. This made for a great shadow box. I covered the inside and frame of the wood with Halloween themed patterned paper to fit my theme. The outside edge is covered with black corrugated paper.

Halloween Mixed Media Shadow Box featuring Jillibean Soup Mix the Media 8x8 Wood Plank and Donna Salazar Art Doll Spellbinder Die by Juliana Michaels

I created the witch using the Donna Salazar Art Doll Die by Spellbinders.

Halloween Mixed Media Shadow Box featuring Jillibean Soup Mix the Media 8x8 Wood Plank and Donna Salazar Art Doll Spellbinder Die by Juliana Michaels

Halloween Mixed Media Shadow Box featuring Jillibean Soup Mix the Media 8x8 Wood Plank and Donna Salazar Art Doll Spellbinder Die by Juliana Michaels

In the end, I ended up with a spooktacular Halloween Shadow Box, that I can't wait to add to my Halloween decorations this year.

Artist Collaboration -  Starting from the Same Place

Thanks so much for stopping by today and I hope you'll check out the InLinkz hop list to be inspired by some of the other talented ladies in this group. 


Subscribe