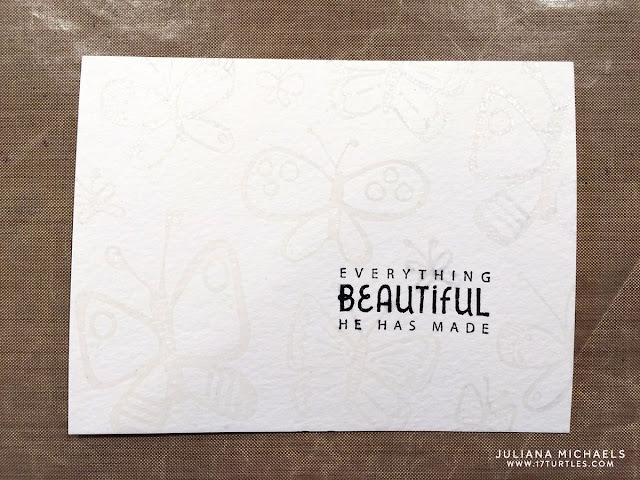
Hello everyone and welcome! Today I'm sharing a one-layer card using a fun technique that I'm calling Dual Embossing. I created this card for the CardMaker and Bella Blvd Blog Hop using the Illustrated Faith Fly Free stamp set. You'll find all the blog hop details below. First though, I invite you to check out this fun technique!
3. Remove the stamps from your MISTI, clean them and position them to fill in the rest of the space where you didn't stamp. This can be a little tricky with the clear ink.
If you're hopping along you should have arrived here from the blog of Jeanne Streiff. The next stop on the hop is Stephanie Buice. For those of you just joining the party, I've included the entire hop list below:
And now for the good stuff...Bella Blvd is having a giveaway! Make sure to leave a comment on each blog for your chance to win this awesome prize featuring some of their new Illustrated Faith products.
Happy Hopping!
1. Begin by positioning your stamps on your MISTI. If you don't have one, I recommend stamping one image at a time. Below you can see how I positioned my stamps.
2. Stamp the images onto watercolor paper using Versamark Embossing Ink.
Tip: Remember to wipe down the paper with an embossing powder pouch or tool before you begin stamping to eliminate moisture and any residual skin oils your fingertips may have left on the paper surface. If you are new to heat embossing check out my Heat Embossing Tutorial on the CardMaker Magazine Blog.
3. Remove the stamps from your MISTI, clean them and position them to fill in the rest of the space where you didn't stamp. This can be a little tricky with the clear ink.
4. Next, stamp your sentiment in Black ink. I recommend Ranger Archival Ink or a pigment ink.
5. Sprinkle the entire image with clear embossing powder and heat set with your embossing gun.
6. Now the Distress Inking fun begins! Select several analogous colors - these are colors that are next to each other on the color wheel. These colors will blend together nicely without creating ugly browns. Apply the ink in a circular motion using a foam blending tool.
7. Take a small paint brush and splatter water onto the card. Dry the water with a paper towel.
8. Die cut the card front using a stitched die cut.
9. Adhere the stamped panel to your card base.
I hope you enjoyed learning about Dual Embossing and Distress Inking. Now it's your turn to give this fun technique a try!
Blog Hop Details
If you're hopping along you should have arrived here from the blog of Jeanne Streiff. The next stop on the hop is Stephanie Buice. For those of you just joining the party, I've included the entire hop list below:
And now for the good stuff...Bella Blvd is having a giveaway! Make sure to leave a comment on each blog for your chance to win this awesome prize featuring some of their new Illustrated Faith products.
Happy Hopping!


I love this technique-it gives such a soft and pretty effect!
ReplyDeleteVery clever-looking forward to trying this technique
ReplyDeletebeautiful backgrounds!! love them!!
ReplyDeleteJust stunning! I'll have to give this a try. Great tips! Lovely cards, just lovely.
ReplyDeleteThese cards are great. Love this technique . Thanks for the inspiration.
ReplyDeleteWhat a beautiful simple card. I love how easy this one would be to mail but still has alot of texture. Thanks fr sharing.
ReplyDeleteHave not tried embossing yet but I love your cards so I will have to give this a try!!
ReplyDeleteLove to emboss and this looks like a fun
ReplyDeleteway to do it. the colors are wonderful.
thanks for sharing.
Lovely cards. Love seeing the illustrated faith used in cards and not just for bible journaling.
ReplyDeletePretty color blending!
ReplyDeleteSuch pretty backgrounds!!
ReplyDeleteVery pretty backgrounds. I usually don't like unrealistic butterflies but these are cute as can be.
ReplyDeleteI love the embossing technique on your cards!! They are simply beautiful!
ReplyDeleteWhat beautiful cards. Love the backgrounds.
ReplyDeleteWhat beautiful cards. Love the backgrounds.
ReplyDeleteThank you so much for the step by step tutorial - can't wait to try this. The cards are beautiful.
ReplyDeleteVery pretty and I like this technique.
ReplyDeleteBeautiful cards! I love one layer cards as they are so easy to mail to my friends! Thanks for sharing these with us!
ReplyDeleteI think I will give this a try, thank you!
ReplyDeleteSuch a wonderful technique and it has beautiful results!!! These cards are simply gorgeous, Juliana!!! Thank you for the great inspiration for this special hop!!! I always love your creations!!
ReplyDeletebeautiful cards!
ReplyDeleteBeautiful technique. Lovely cards.
ReplyDeleteLove this technique!! Pretty cards!
ReplyDeleteWhat a fabulous set of cards- I really need to get a Misti.... NEED IT! Thanks so much for the chance to win! savannahland2 at comcast dot net
ReplyDelete