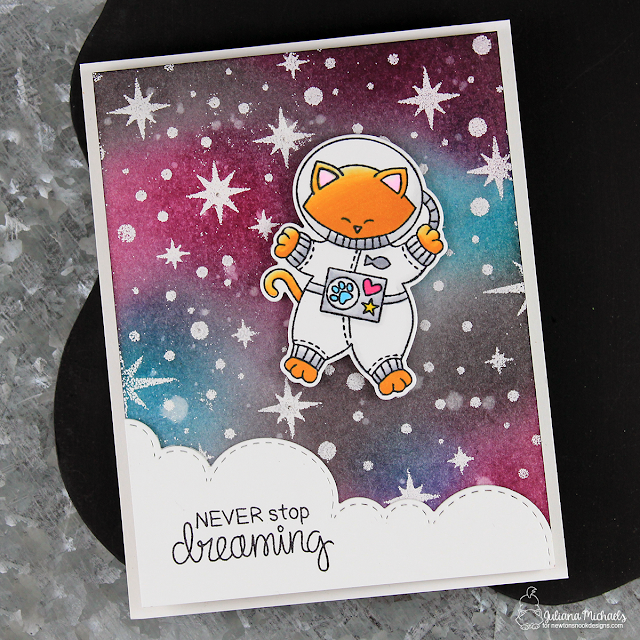
Everyone loves an interactive card, so how about a card that lights up? This week, Newton's Nook Designs and Chibitronics are partnering for a fabulous inspiration week! All week long both design teams will be sharing ways to light up your cards using Chibi lights with Newton's Nook Designs stamps! There is also an awesome giveaway going on, so make sure to check out the details after you check out my card.
To create a quick and easy galaxy background, gather your supplies. This includes a piece of watercolor paper, Newton's Nook Designs Starfield Stencil, Versamark Embossing Ink, White embossing powder, Heat gun, and Foam Blending Tool. You will also need Distress Ink in Picked Raspberry, Peacock Feathers, Seedless Preserves and Black Soot. All of these supplies are linked below if you are interested.
Begin by placing the Starfield Stencil over the watercolor paper and tap the Versamark ink pad on top of the stencil to apply the ink. Remove the stencil, sprinkle with white embossing powder. Tap of the excess powder and heat set it using the heat gun.
When I started thinking of ideas on what to create, I was immediately inspired to use the Chibi lights with the Cosmic Newton stamp set and Starfield Stencil. I thought it would be fun to create a galaxy background and light up a few of the stars.
Quick and Easy Galaxy Background
To create a quick and easy galaxy background, gather your supplies. This includes a piece of watercolor paper, Newton's Nook Designs Starfield Stencil, Versamark Embossing Ink, White embossing powder, Heat gun, and Foam Blending Tool. You will also need Distress Ink in Picked Raspberry, Peacock Feathers, Seedless Preserves and Black Soot. All of these supplies are linked below if you are interested.
Begin by placing the Starfield Stencil over the watercolor paper and tap the Versamark ink pad on top of the stencil to apply the ink. Remove the stencil, sprinkle with white embossing powder. Tap of the excess powder and heat set it using the heat gun.
Next take your ink blending tool and apply the Distress Ink in Picked Raspberry, Peacock Feathers, and Seedless Preserves in several areas over the embossed watercolor paper. Don't cover the entire piece of paper with these colors. Make sure to leave a little space between them at some points and allow them to blend together in others. Next, take the Black Soot and apply it to the open areas and then blend it lightly over the colored areas. There you have it...a quick and easy galaxy background!
Now things get a little more complicated, but the effort is definitely worth it! Once my background was complete, I went about adding the Chibitronics lights using their Chibi Lights Starter Kit. As you can see in the photo below, I designed it so that several of the stars would light up when you press on the sentiment.
Chibitronic LED Circuit Stickers Tips & Tricks
This was my first time working with this product and I'll admit it was a bit of trial and error to learn how to create the circuit. My first bit of advice is to actually read the instruction booklet that comes with the kit. It breaks it all down into simple sets and makes it easy to follow. Second, make sure the tips on the LED stickers are fully touching the copper tape so that the circuit is complete and they will light. If you think it might be the battery, think again. It's probably a poor connection somewhere. Don't ask me how I know this! LOL Seriously, though, don't give up until you get it working. The end result is SO much fun and I can't wait to create another one in the near future!
As I mentioned in the beginning, here are all the details about the giveaway. One lucky winner will receive a prize pack including a Starter Kit from Chibitronics and a $30 store credit to Newton’s Nook Designs. Would you like to be the winner? If so, leave a comment on the Newton Nook Designs Blog & Design Team blog posts from August 21-25. The links for each blog can be found on the Newton's Nook Blog. One winner will be randomly chosen from all of the blog posts throughout the week so the more posts you leave comments on the better your chances are of winning! You have until Friday August 25th at midnight CST to comment. The winner will be announced on the NND blog post on Monday, August 28th.
For another chance to win, make sure to visit the the Chibitronics Blog each day this week for more inspiration!
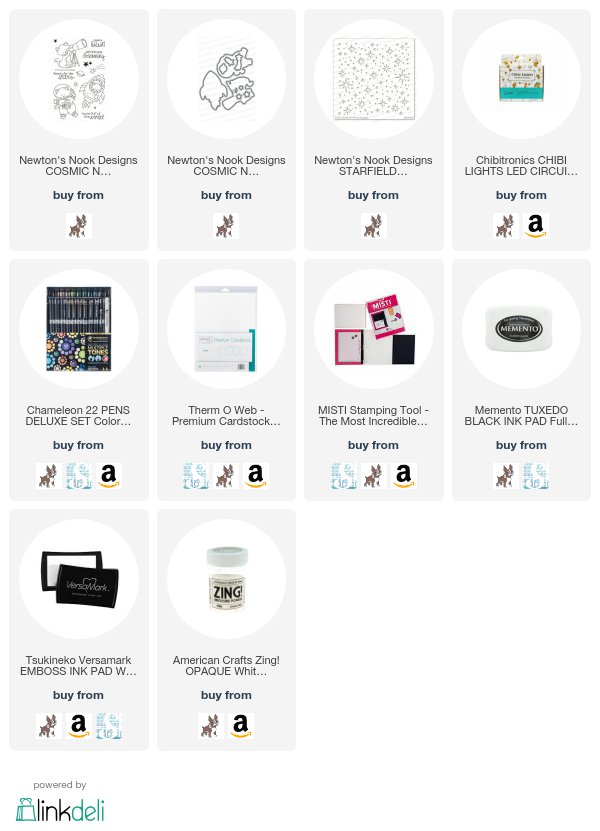
Are you interested in the supplies I used to create this card? To make them easy for you to find, I've listed them below. Affiliate links are used at no additional cost to you and I've linked to them because I use them and love them! Click on the image below each picture to go to your favorite store.

Giveaway
As I mentioned in the beginning, here are all the details about the giveaway. One lucky winner will receive a prize pack including a Starter Kit from Chibitronics and a $30 store credit to Newton’s Nook Designs. Would you like to be the winner? If so, leave a comment on the Newton Nook Designs Blog & Design Team blog posts from August 21-25. The links for each blog can be found on the Newton's Nook Blog. One winner will be randomly chosen from all of the blog posts throughout the week so the more posts you leave comments on the better your chances are of winning! You have until Friday August 25th at midnight CST to comment. The winner will be announced on the NND blog post on Monday, August 28th.
For another chance to win, make sure to visit the the Chibitronics Blog each day this week for more inspiration!
Supplies
Are you interested in the supplies I used to create this card? To make them easy for you to find, I've listed them below. Affiliate links are used at no additional cost to you and I've linked to them because I use them and love them! Click on the image below each picture to go to your favorite store.


Juliana, those lights are so impressive on your adorable card. Also that background is gorgeous!
ReplyDeleteQuick & easy BG??? Sure ... lol It's AWEmazing. Love
ReplyDeletethis beautiful card, so cute & love the lights.
What a great card...I have been dying to try the Chibitronics. Love the space cat!
ReplyDeleteVery cool! The space scene is the perfect example for using the fun lights. Thanks for the terrific inspiration.
ReplyDeleteLove the sky and space cadet Newton! Such a fun card with beautiful colors! Love the addition of the lights to make it extra special!
ReplyDeleteSpace Newton is soooo cute! I love the way you made the stars shine too.
ReplyDeleteAmazing!!!!
ReplyDeleteI love your galaxy background!!
ReplyDeleteSo cute! Love the stitched clouds, starry sky and the great interactive light element!
ReplyDeleteGreat card. The lights push it to a whole other level.
ReplyDeleteFabulous galaxy scene and so cool that it lights up.
ReplyDeleteLove you galaxy scene and
ReplyDeletethe lights are so fun!
Carla from Utah
Oh my goodness!!! Such adorable project!!! Love this fabulous starry sky!!!
ReplyDeleteThis is such a fantastic card! I love your galaxy background, and the lights are such a wonderful effect!
ReplyDeleteSuch a cute card and I love your galaxy background. It's beautiful!! I like the pink in there. It's often not added to a galaxy background but I love it. Thanks for explaining how to create it too. Very clear and it sounds doable. The lights are the perfect touch.
ReplyDeleteBeautiful! I love the colorful galaxy background and the glowing stars :)
ReplyDeleteFabulous card, and how it lights up is very cool!
ReplyDeleteSuch a gorgeous card! I love the way you added lights to the night sky! Thank you so much for being part of our fun inspiration week!
ReplyDelete-Jen {Newton's Nook Designs}
Thank you for sharing your wonderful creation, inspiration and instructions. Too cute!
ReplyDeleteA glaxay that shines in more ways than one... How cool!
ReplyDeleteA glaxay that shines in more ways than one... How cool!
ReplyDelete